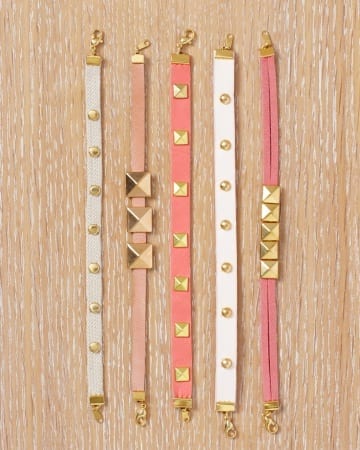
Studs are all over the runways, but you don’t have to buy new designer accessories — or pay designer prices — to get the look.
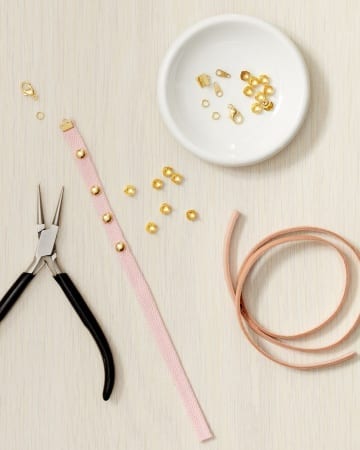
Tools and Materials
Thin webbing and leather strips, 1/8″ to 1/2″ wide
Clasps, tags, jump rings
Scissors
Craft knife
Studs
Round needle-nose pliers and nylon jaw pliers
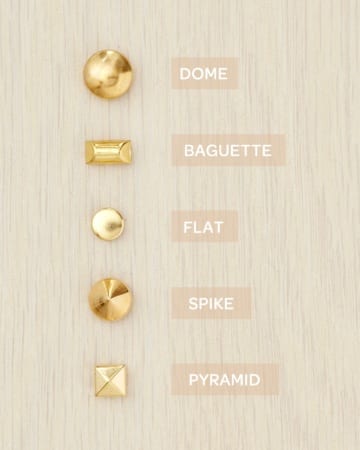
Glossary
Studs, also referred to as nailheads, come in different shapes, sizes, colors, and finishes. This glossary will help you identify the different types.
Studded Thin Bracelet How-To
For Webbing
Cut webbing or leather length to fit wrist. Push stud spikes through webbing and fold closed with needle-nose pliers.
For Leather Bracelets
Press stud into strip, creating an indentation where each spike will go. Use the tip of your craft knife to pierce the leather at each of these marks. Push stud through at these marks, closing spikes around leather with your needle-nose pliers. Squeeze with nylon jaw pliers to secure studs.
If using studs wider than your leather, fold perpendicular spikes in before attaching stud, then fold parallel spikes over the edge of strip, clamping stud in place.
Source: MSL
Modern Day Moms
Modern Day Moms is an award-winning publication centered around motherhood that is real and unfiltered. Basically, we don't sugarcoat anything and aren't afraid to tell you the truth. Let's be best friends, we will make you feel more normal.


Leave a Comment