
I am absolutely thrilled to be able to present this DIY to you guys! It took me a while to get everything together and done, including this post because of weather and other reasons. But here it is!
This is a DIY you’ll want to have help with at times, mostly when you start getting all of it together because it is going to be heavy and hard to lift or turn or whatever you need to do. This console is large…its long, mostly, but you could make adjustments to the dimensions, if you want. Just be careful if you do and make sure you draw out a blueprint and go over it several times to make sure things will add up correctly.
Before you get started on the console, let’s get our stain ready. If you want to have the same look that I did, then you will need a few fine steel wool pads, some white vinegar and a mason jar. Put your pads in the jar, pour vinegar and cover them, loosely put the lid on and leave them in your garage or a safe area (so it doesn’t get knocked over) for a few days (3 is good).
First you will need these items to construct the console:
- 6 – 2x2s @ 8 feet long (I bought 9 bc the cheaper ones are hard to find 6 that are perfectly straight)
- 3 – 2x4s @ 8 feet long
- 1 – 1×12 @ 12 feet long
- 3 – 2x6s @ 8 feet
- 1 1/4″ and 2 1/2″ pocket hole screws
- wood glue
- Kreg jig
These are the pieces you will wind up with once you make all your cuts:
- 1″ X 12′ = 2 cuts @ 63.5″ long (shelves)
- 2″ X 6″ = 3 cuts @ 74.5″ long (top)
- 2″ X 4″ = 6 cuts @ 30.5″ long (legs)
- 2″ X 4″ = 5 cuts @ 11.25″ long (ends)
- 2″ X 2″ = 2 cuts @ 11.25″ long (ends)
- 2″ X 2″ = 12 cuts @ 30″ long (borders)
- 2″ X 2″ = 2 cuts @ 22.5″ (long point to short point – ends parallel – cut at 60 degrees off square)
- 2″ X 2″ = 4 cuts @ 11.25″ (longest point to shortest point, long end cut at 60 degrees off square, short point cut at 30 degrees off square, angles are in same direction)
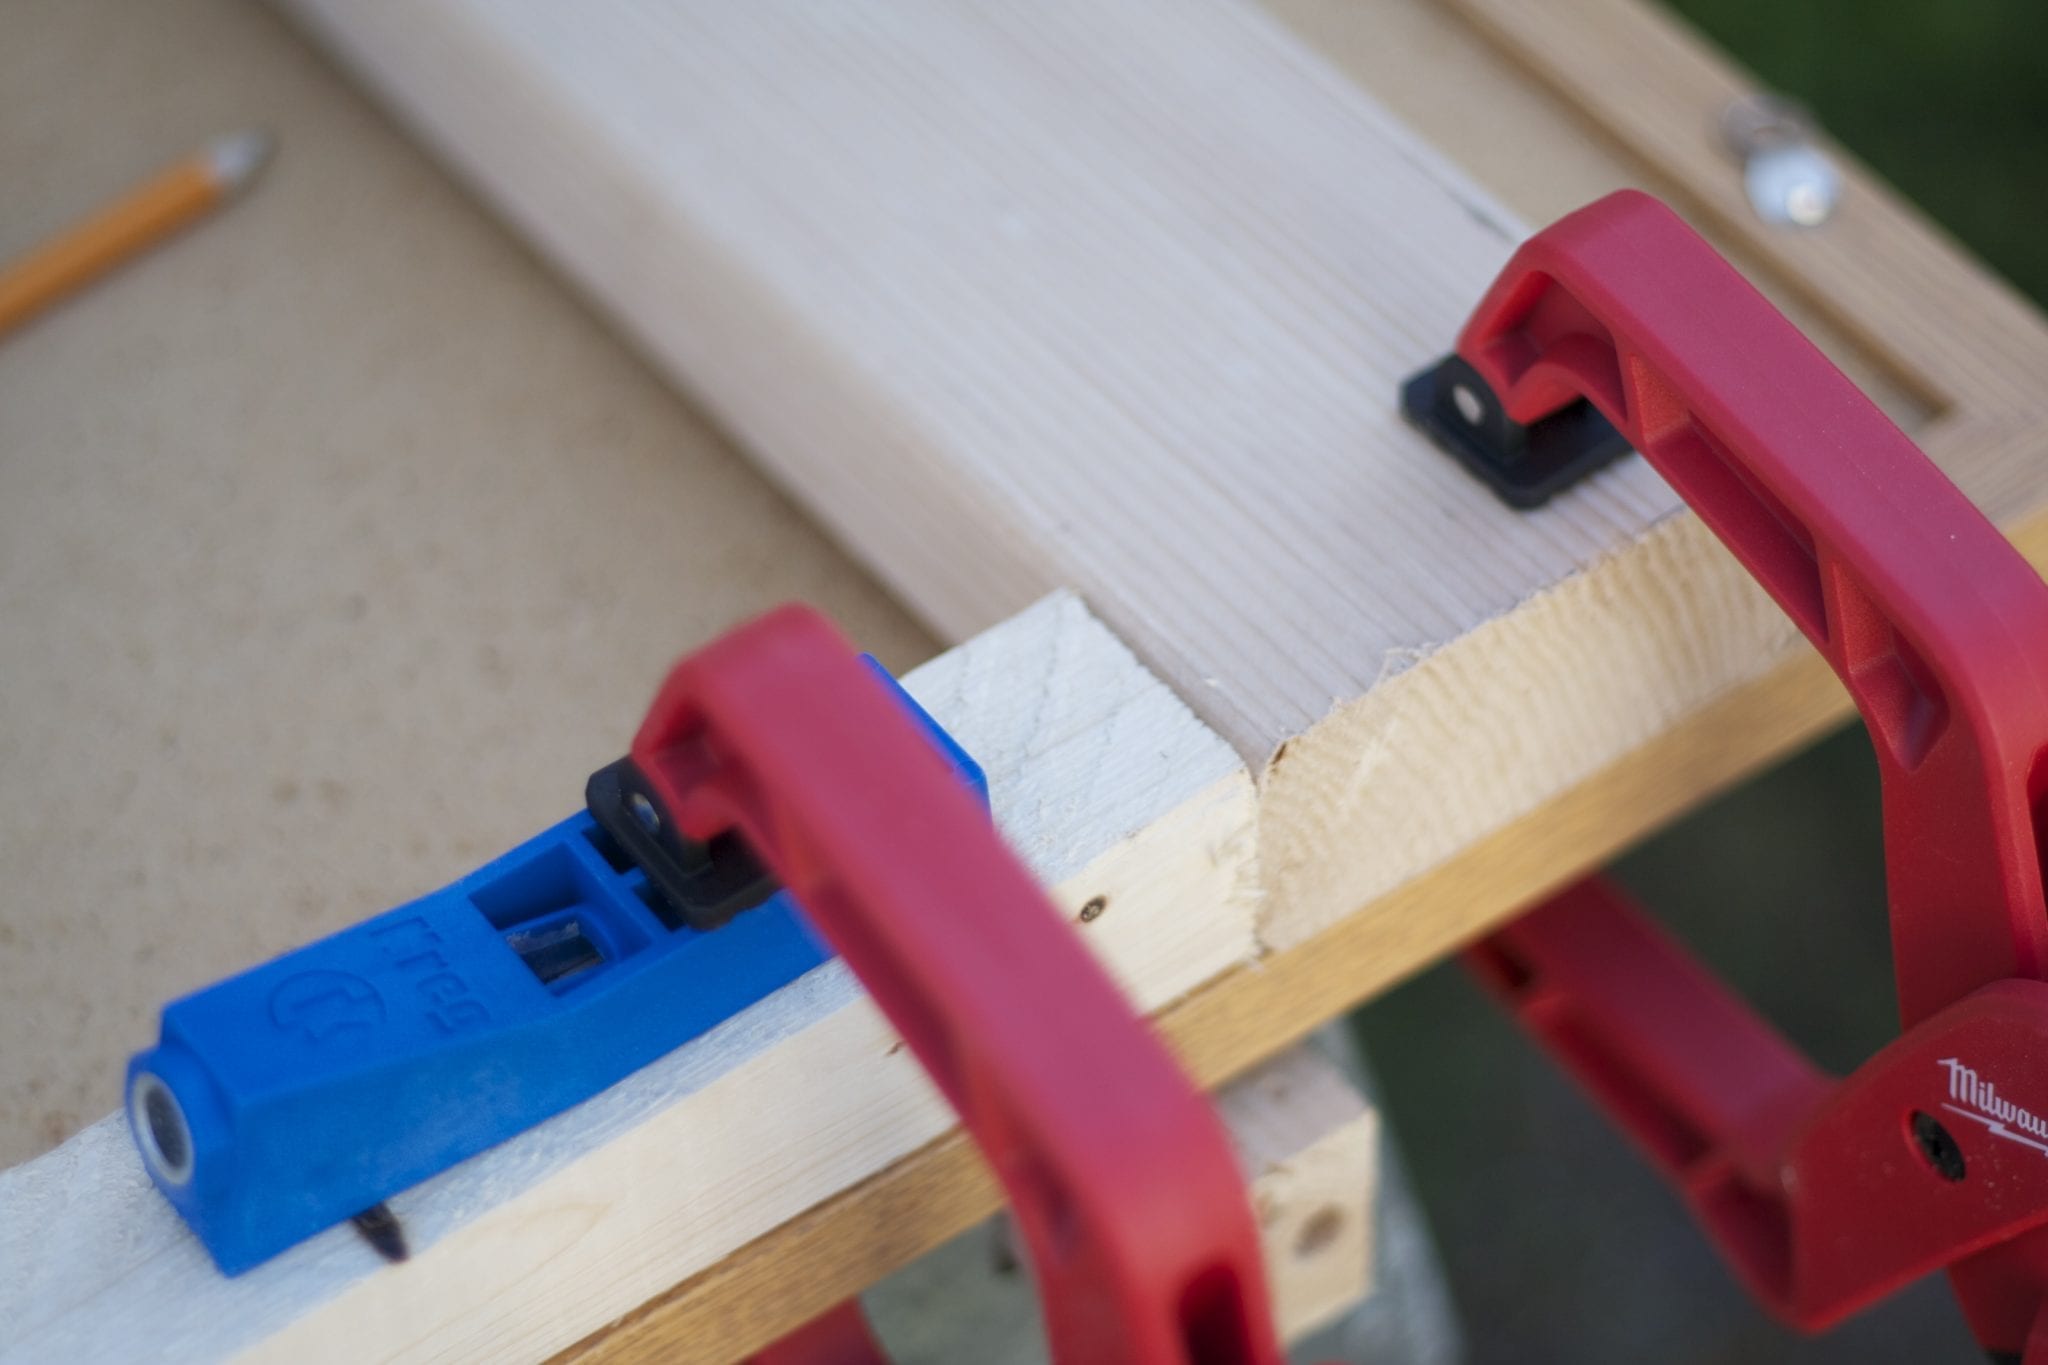
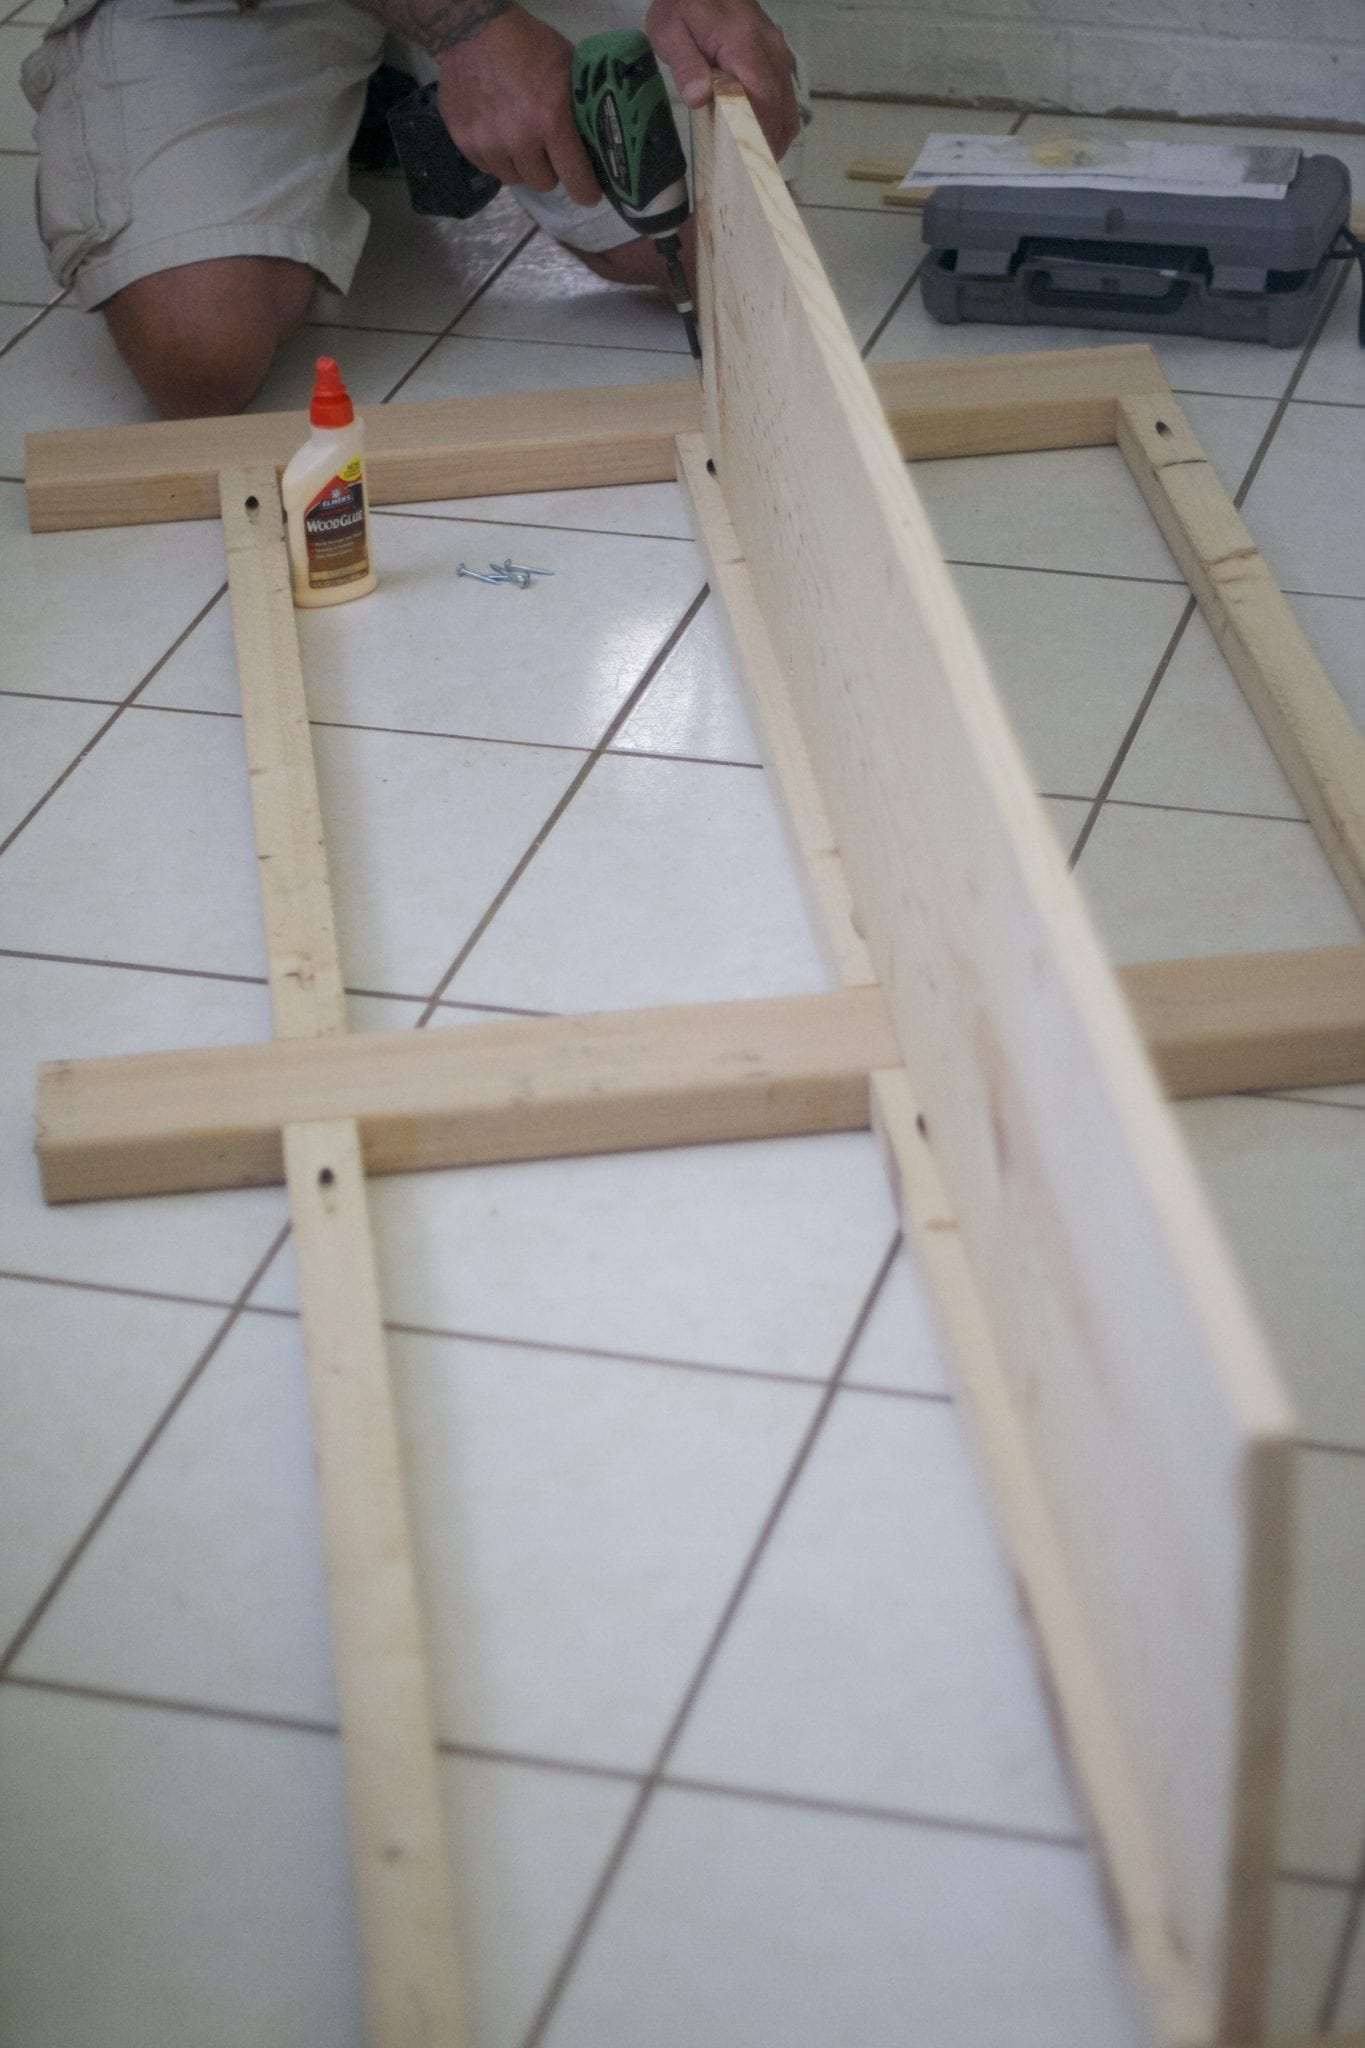
First, you will want to build the front and back frames. You will use three leg pieces on each side and six of the 2X2 pieces that are 30″ long. To connect the 2X2s to the 2X4s, you will need to use your Kreg Jig and 2 1/2″ pocket hole screws. Use wood glue for additional strength.
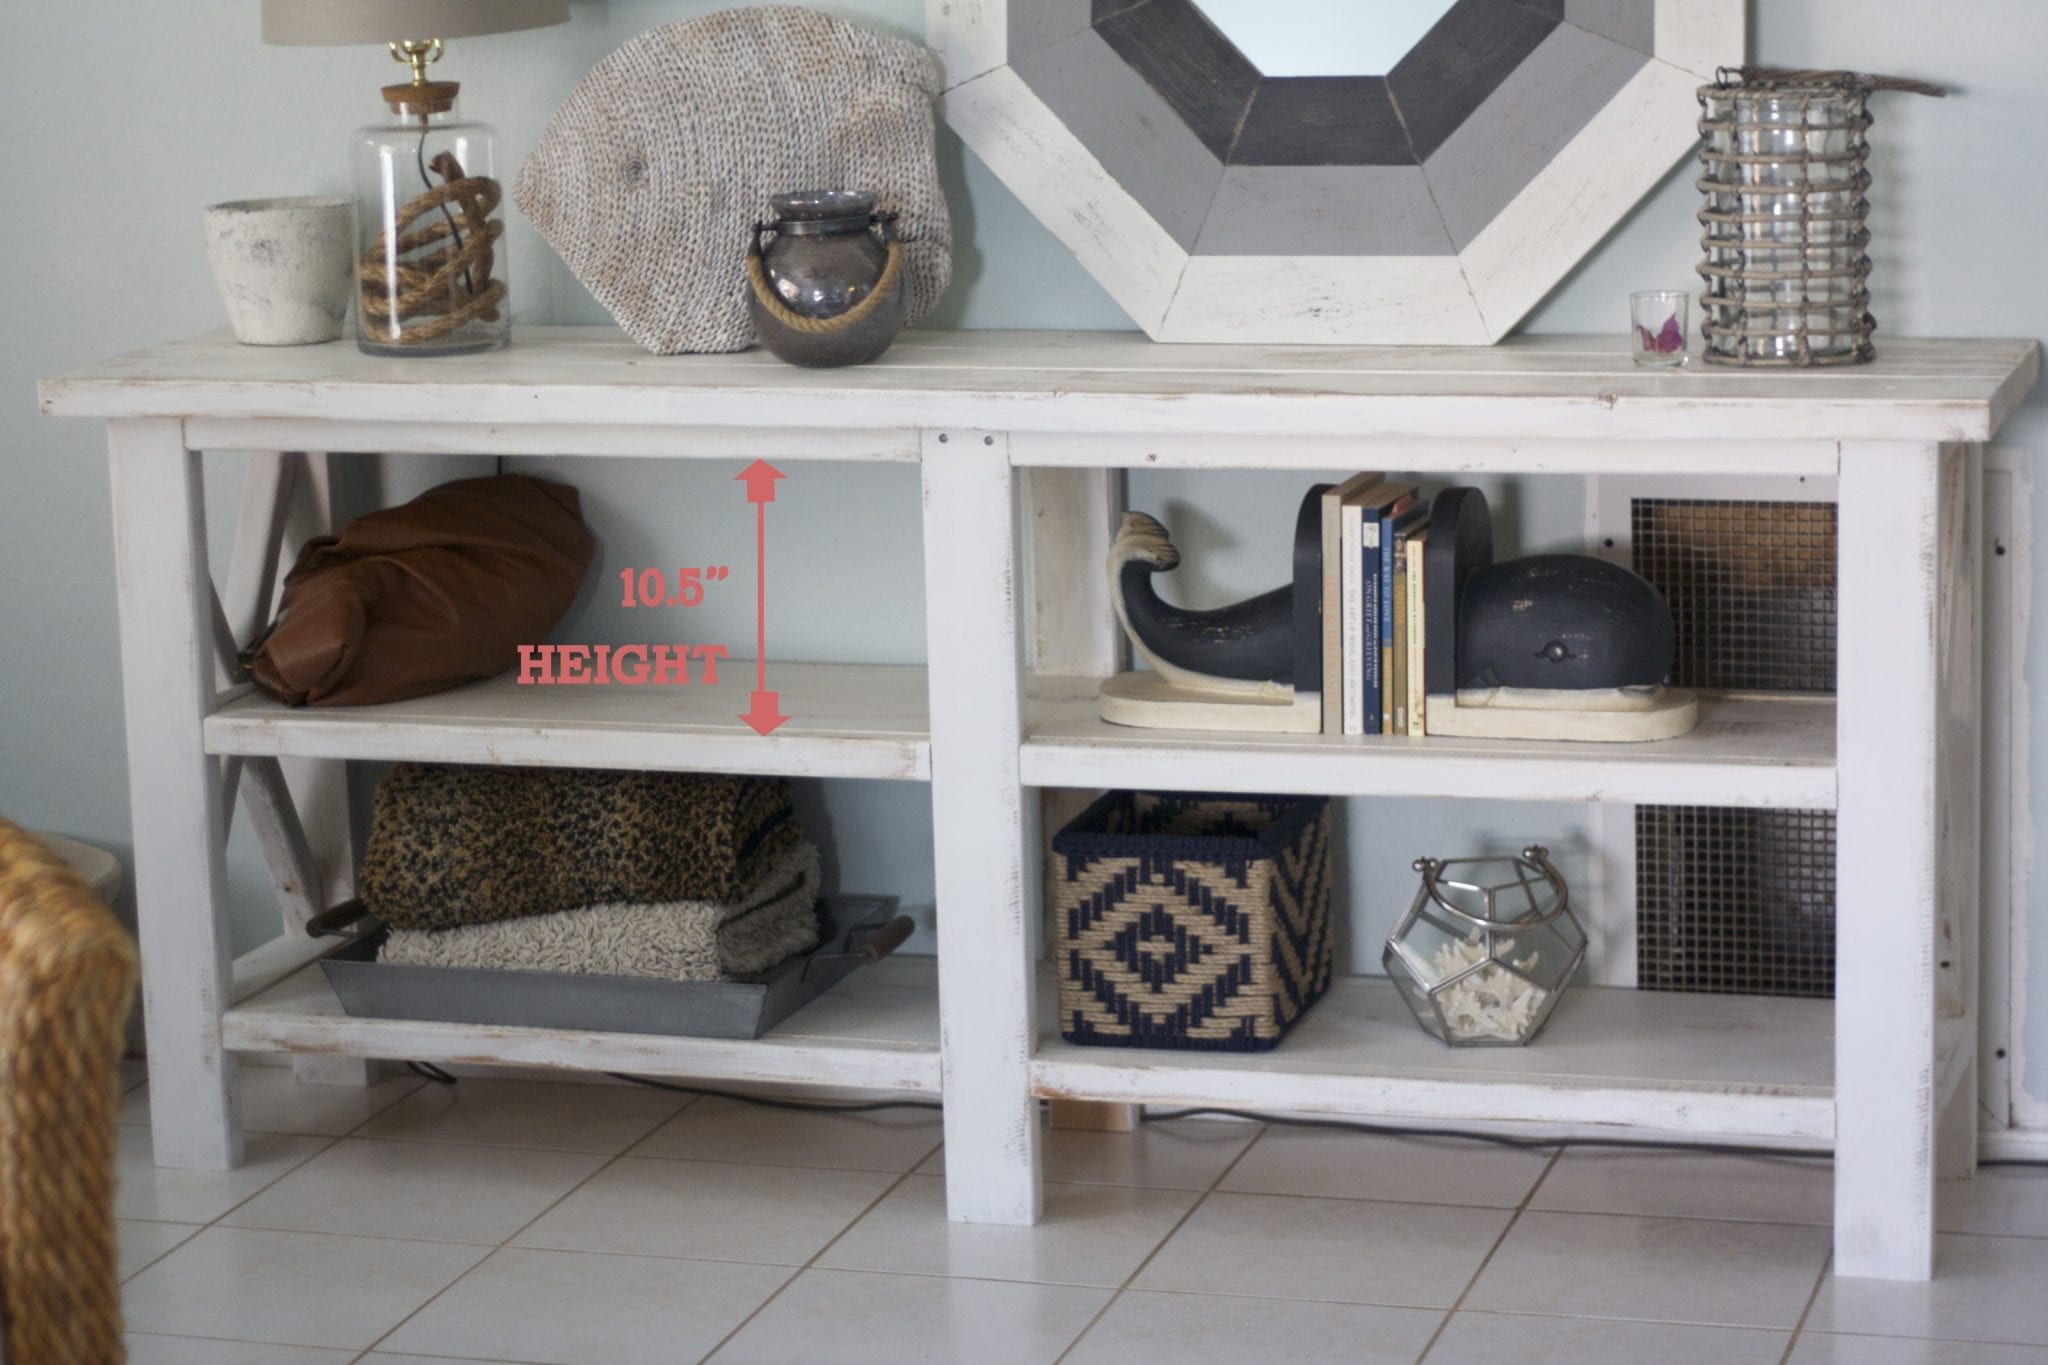
Mount the 2X2 on your work surface and clamp it down in place while bumped up against the 2X4 you will eventually mount it to. Make sure the top 2X2 is flush with the top of the 2X4. The second 2X2 will be 10.5″ below the top 2X2 with the inside of your table facing up. The bottom 2X2 will be 5″ above the floor. Use the Kreg Jig according to the instructions. (I purchased the $20 kit at Home Depot)

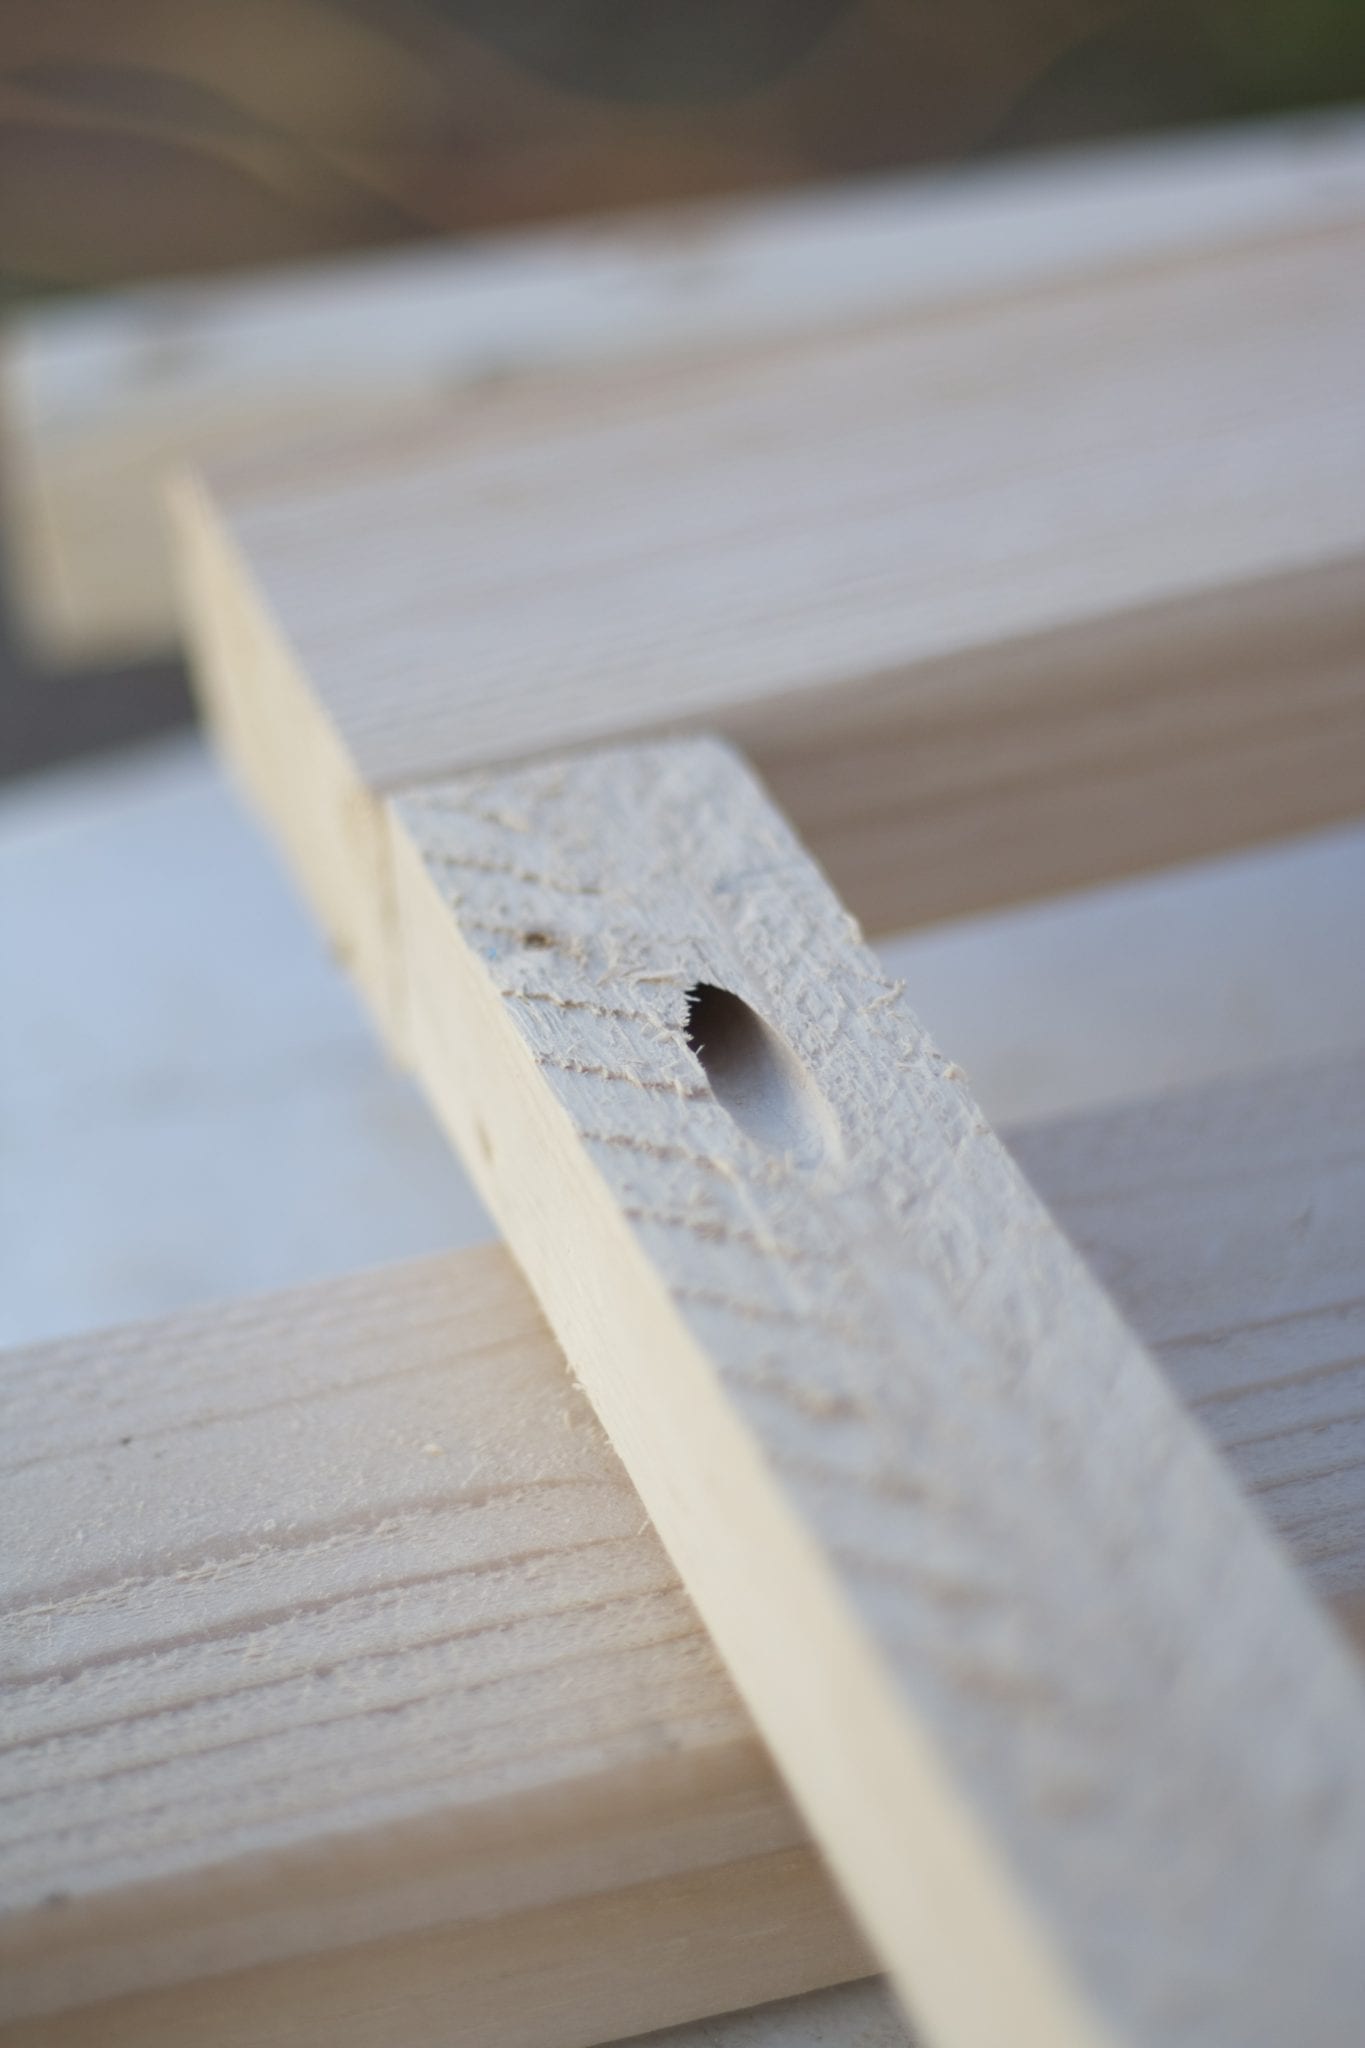
You will wind up with a hole that you can easily screw your nailhead screw into, attaching both pieces together with no visible screws.
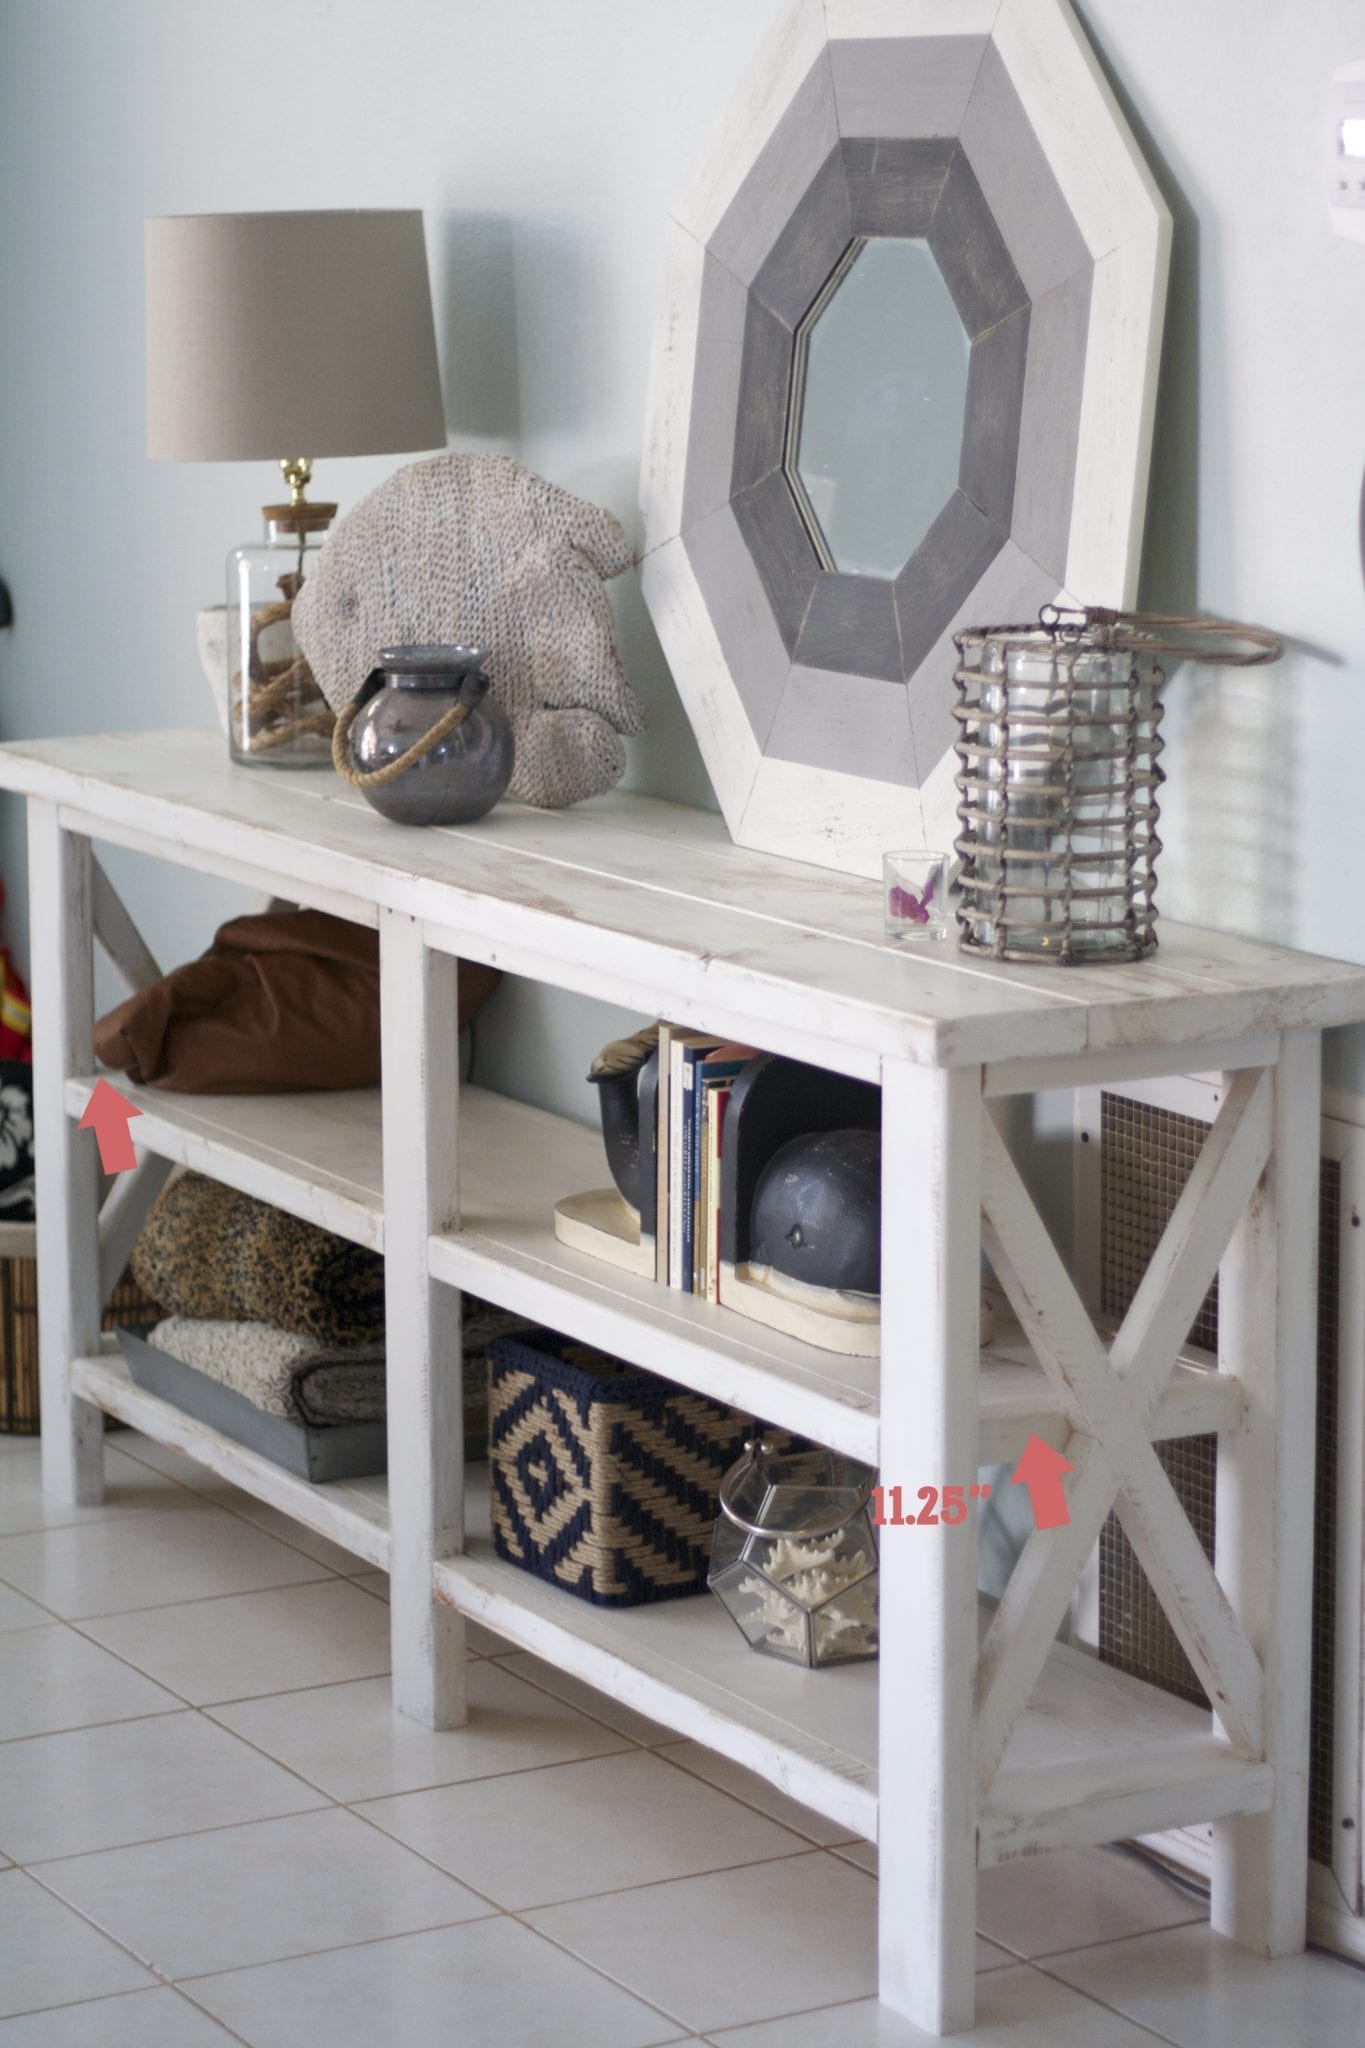
Here is a visual of the frame from the actual photo along with the dimensions. It always helps me to see it all together while I am trying to put it together. This is the outline of the frame you are building:
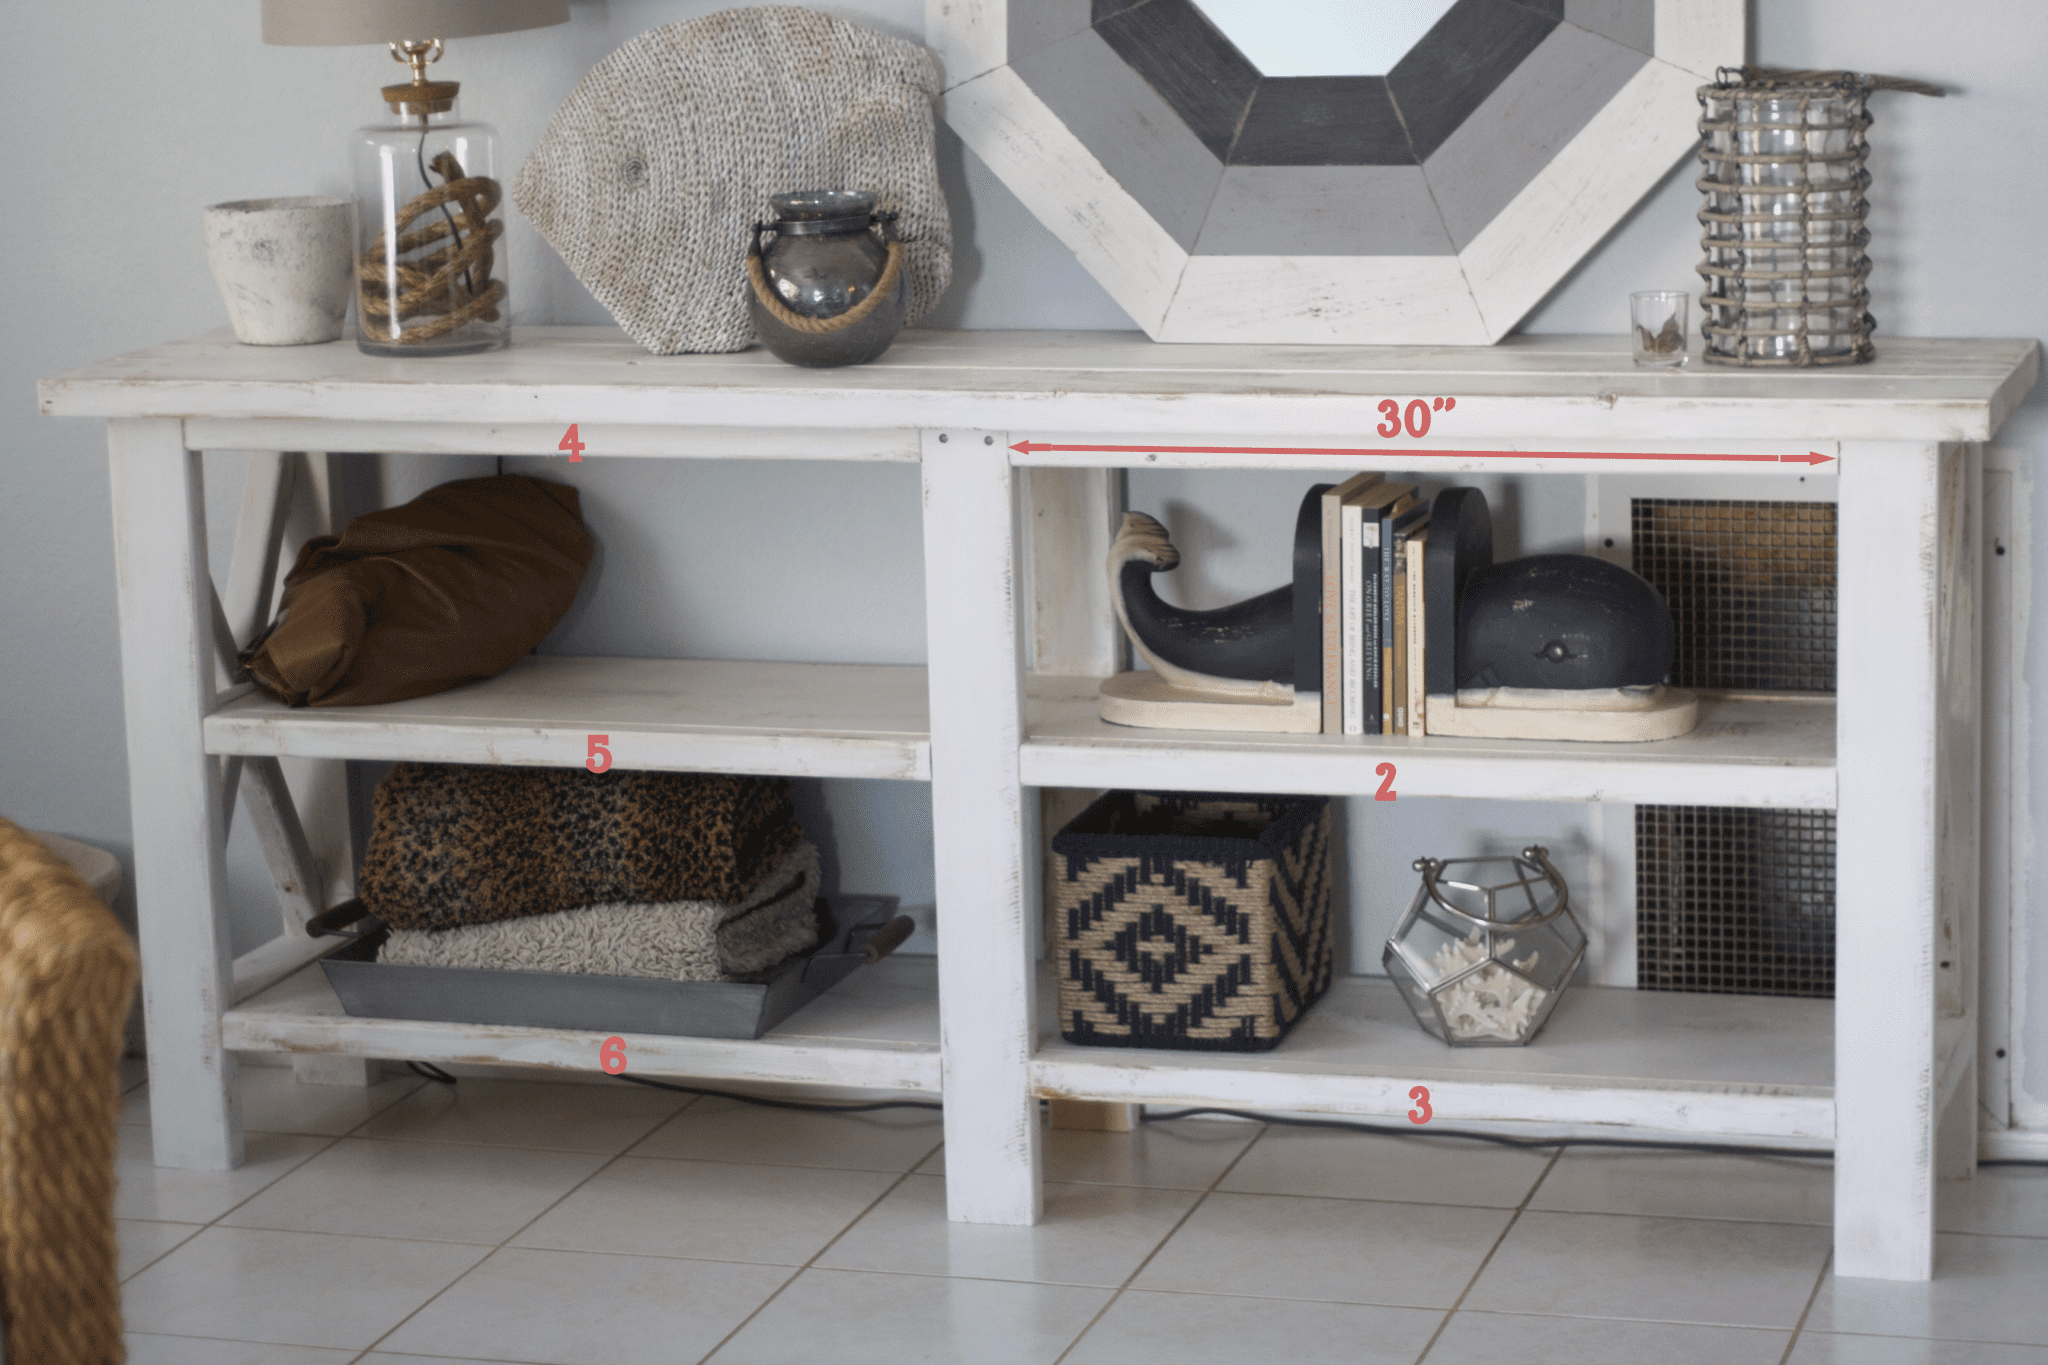
You will have three legs on each frame. They will all be 30.5″ in height.
You will have 6 2X2s on each frame and they will be 30″ long.
There will be 10.5″ in distance from each 2X2 to the one below it. The bottom one will have 5″ distance to the floor. This is to allow room for your vacuum to fit underneath it.
Make two frames exactly like this, one for the front and one for the back. Once you have both made, you will then connect them together with your shelves. Lay one frame on its side to do this. You will also need a second person to help you with this to steady the shelf while you attach it. Attach the shelves with the 1 1/4″ pocket hole screws into the 2X2 border pieces.
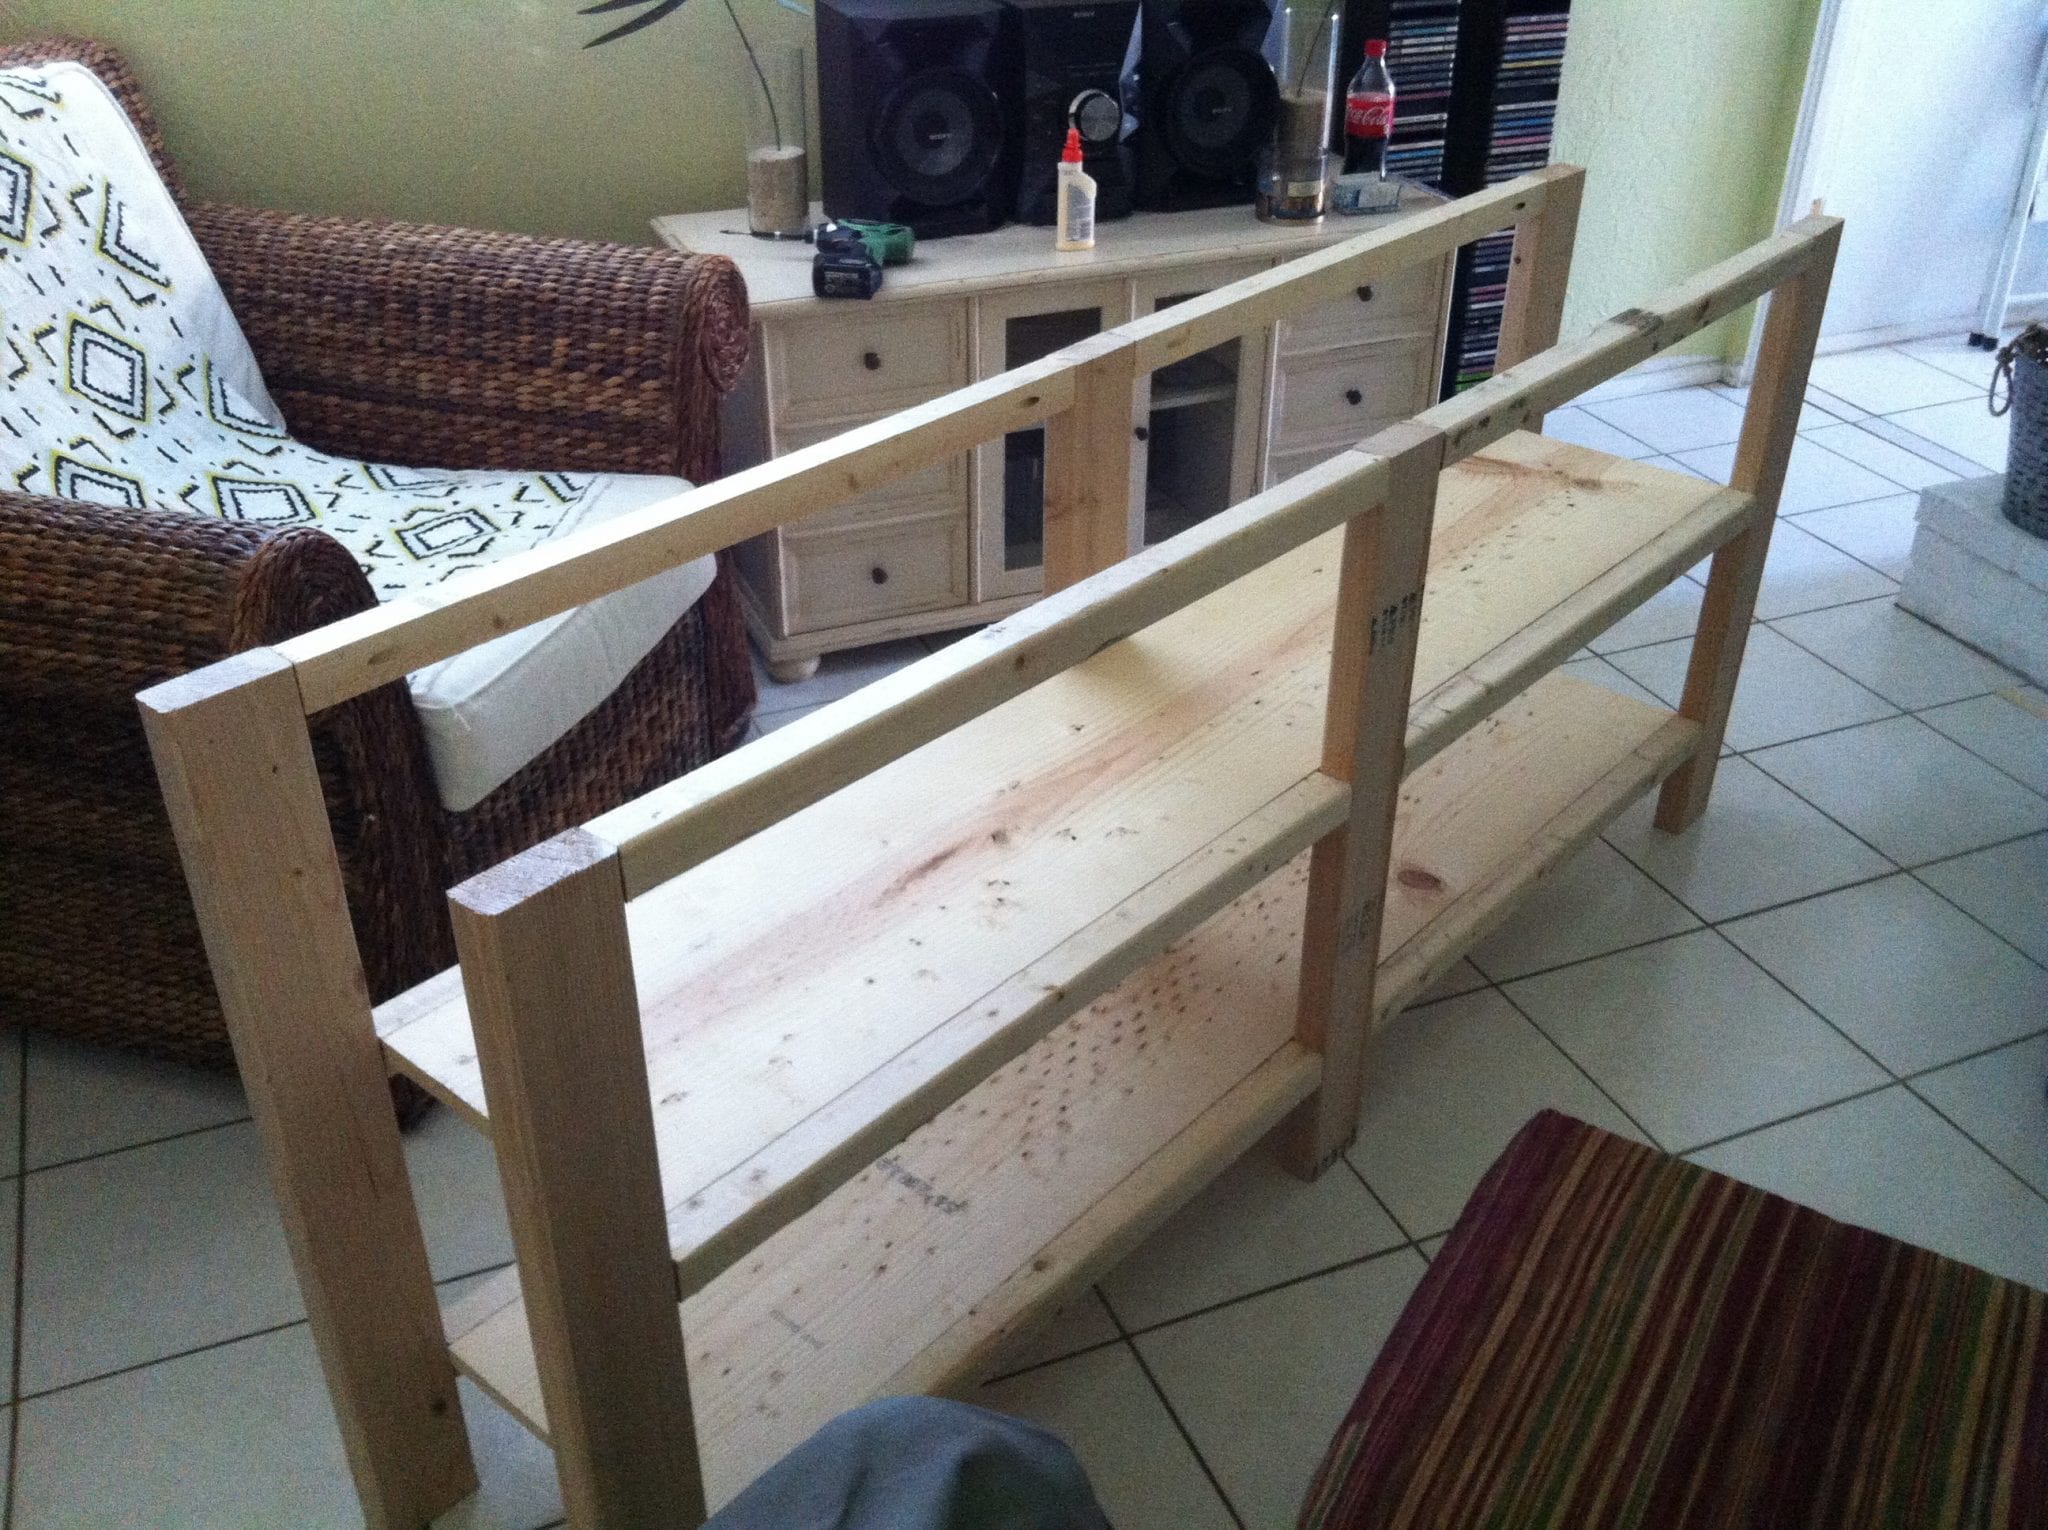
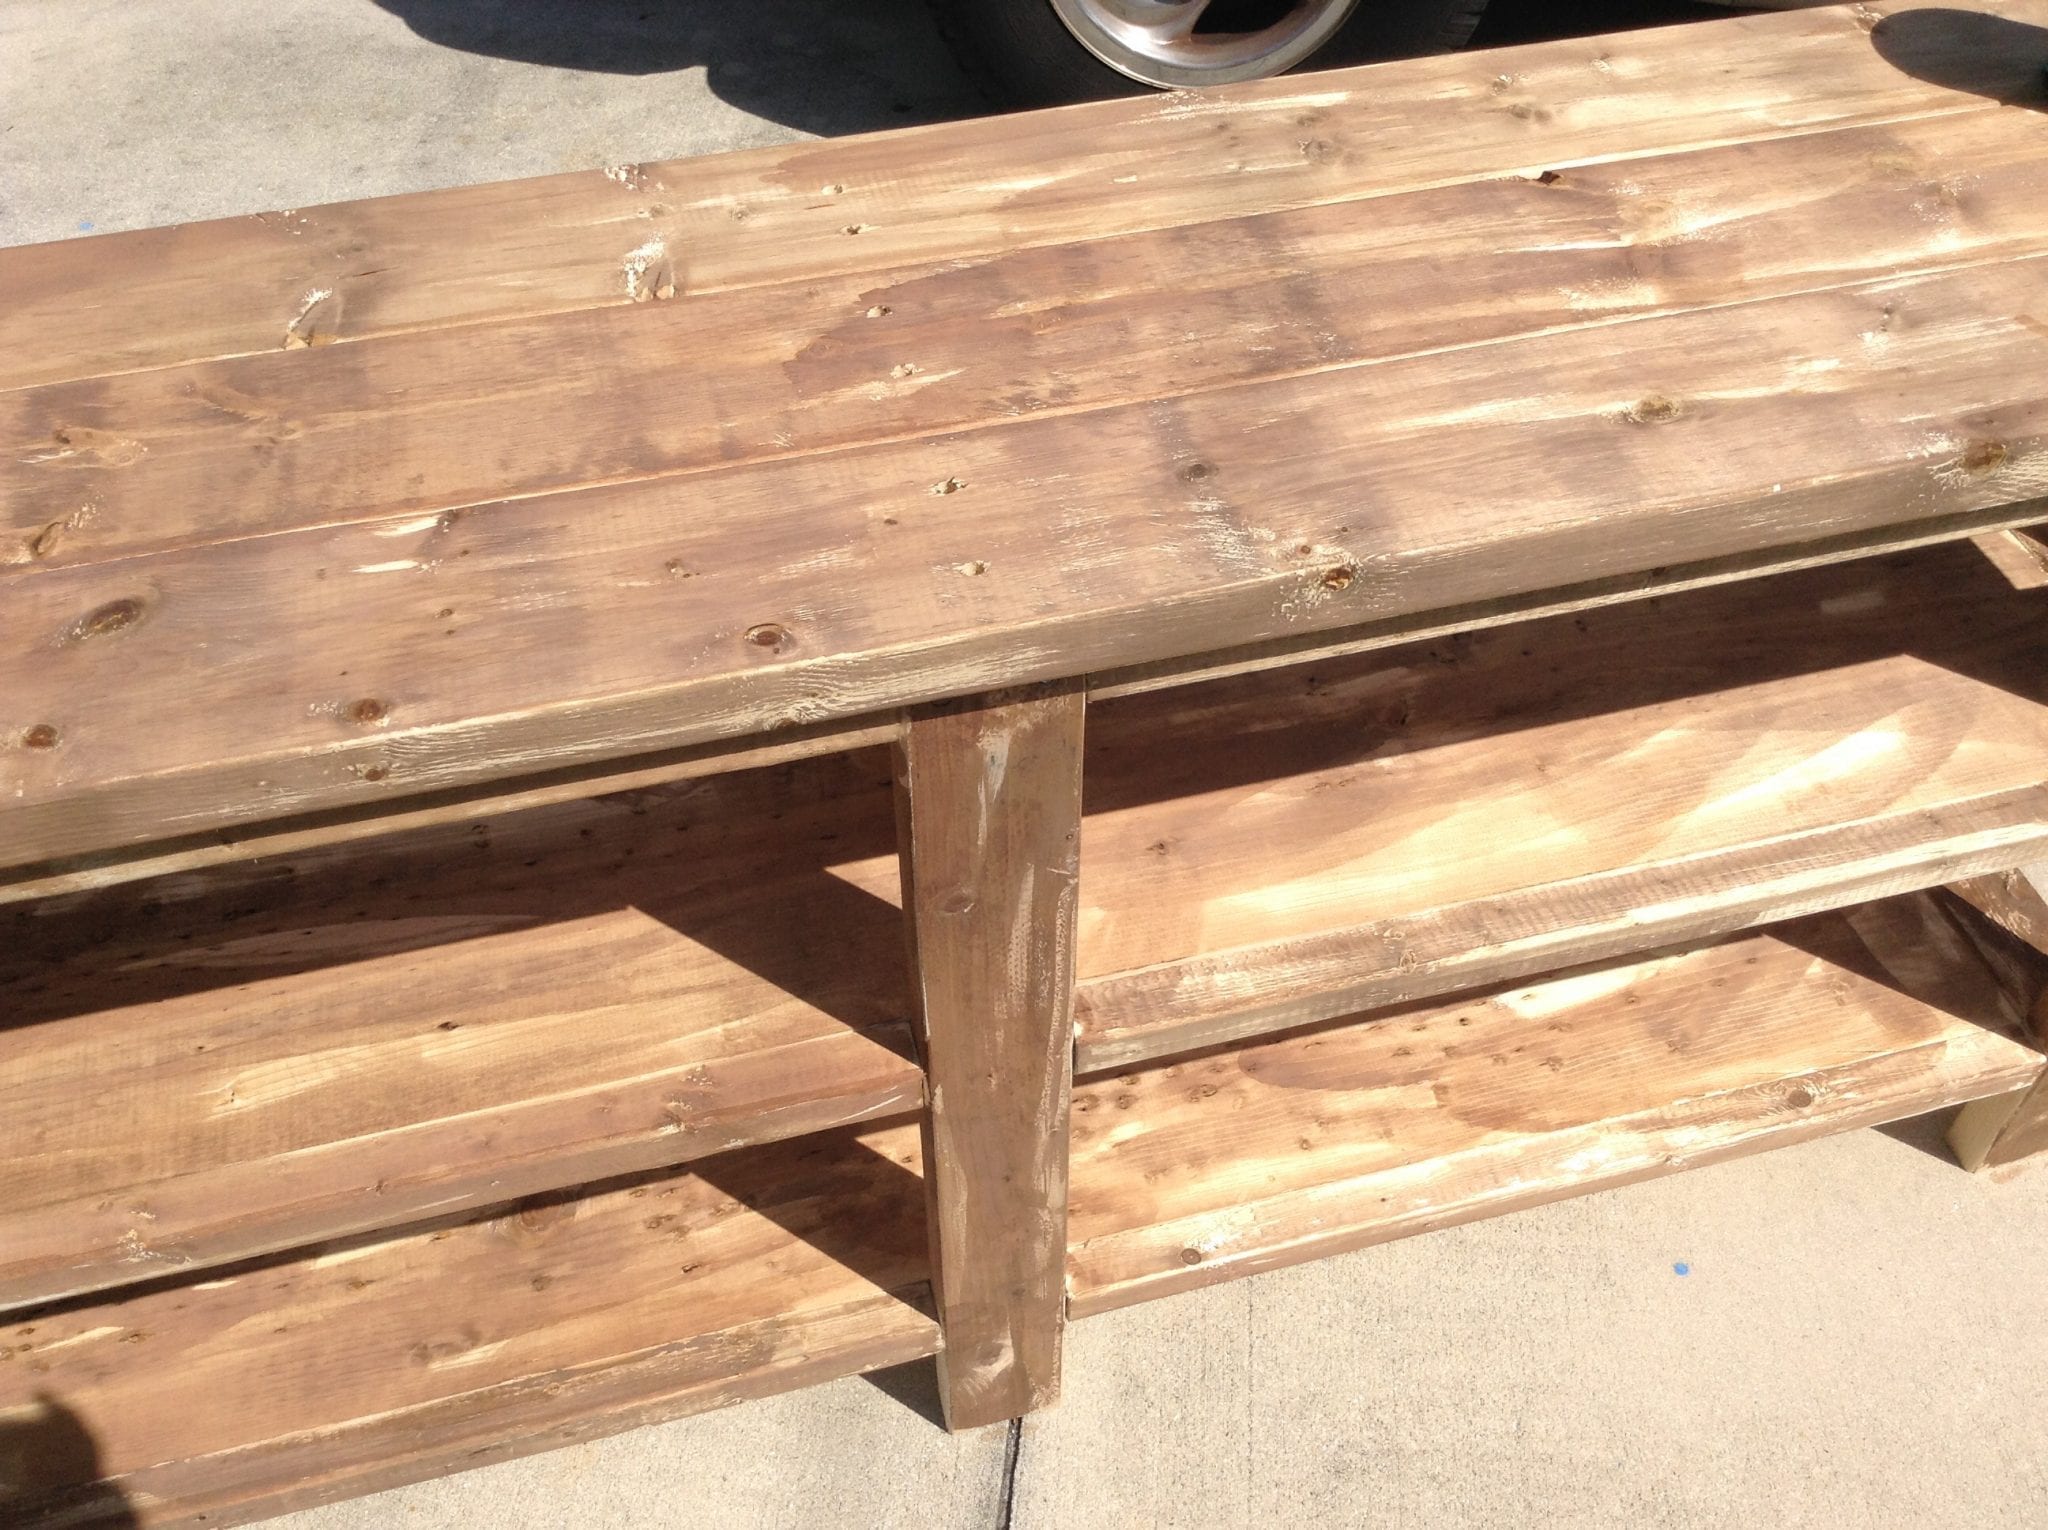
This is how it will look once you have the shelves connected to the frames:
For some reason, I forgot to take photos along the rest of the process. I was too excited to get it all put together, I guess. lol
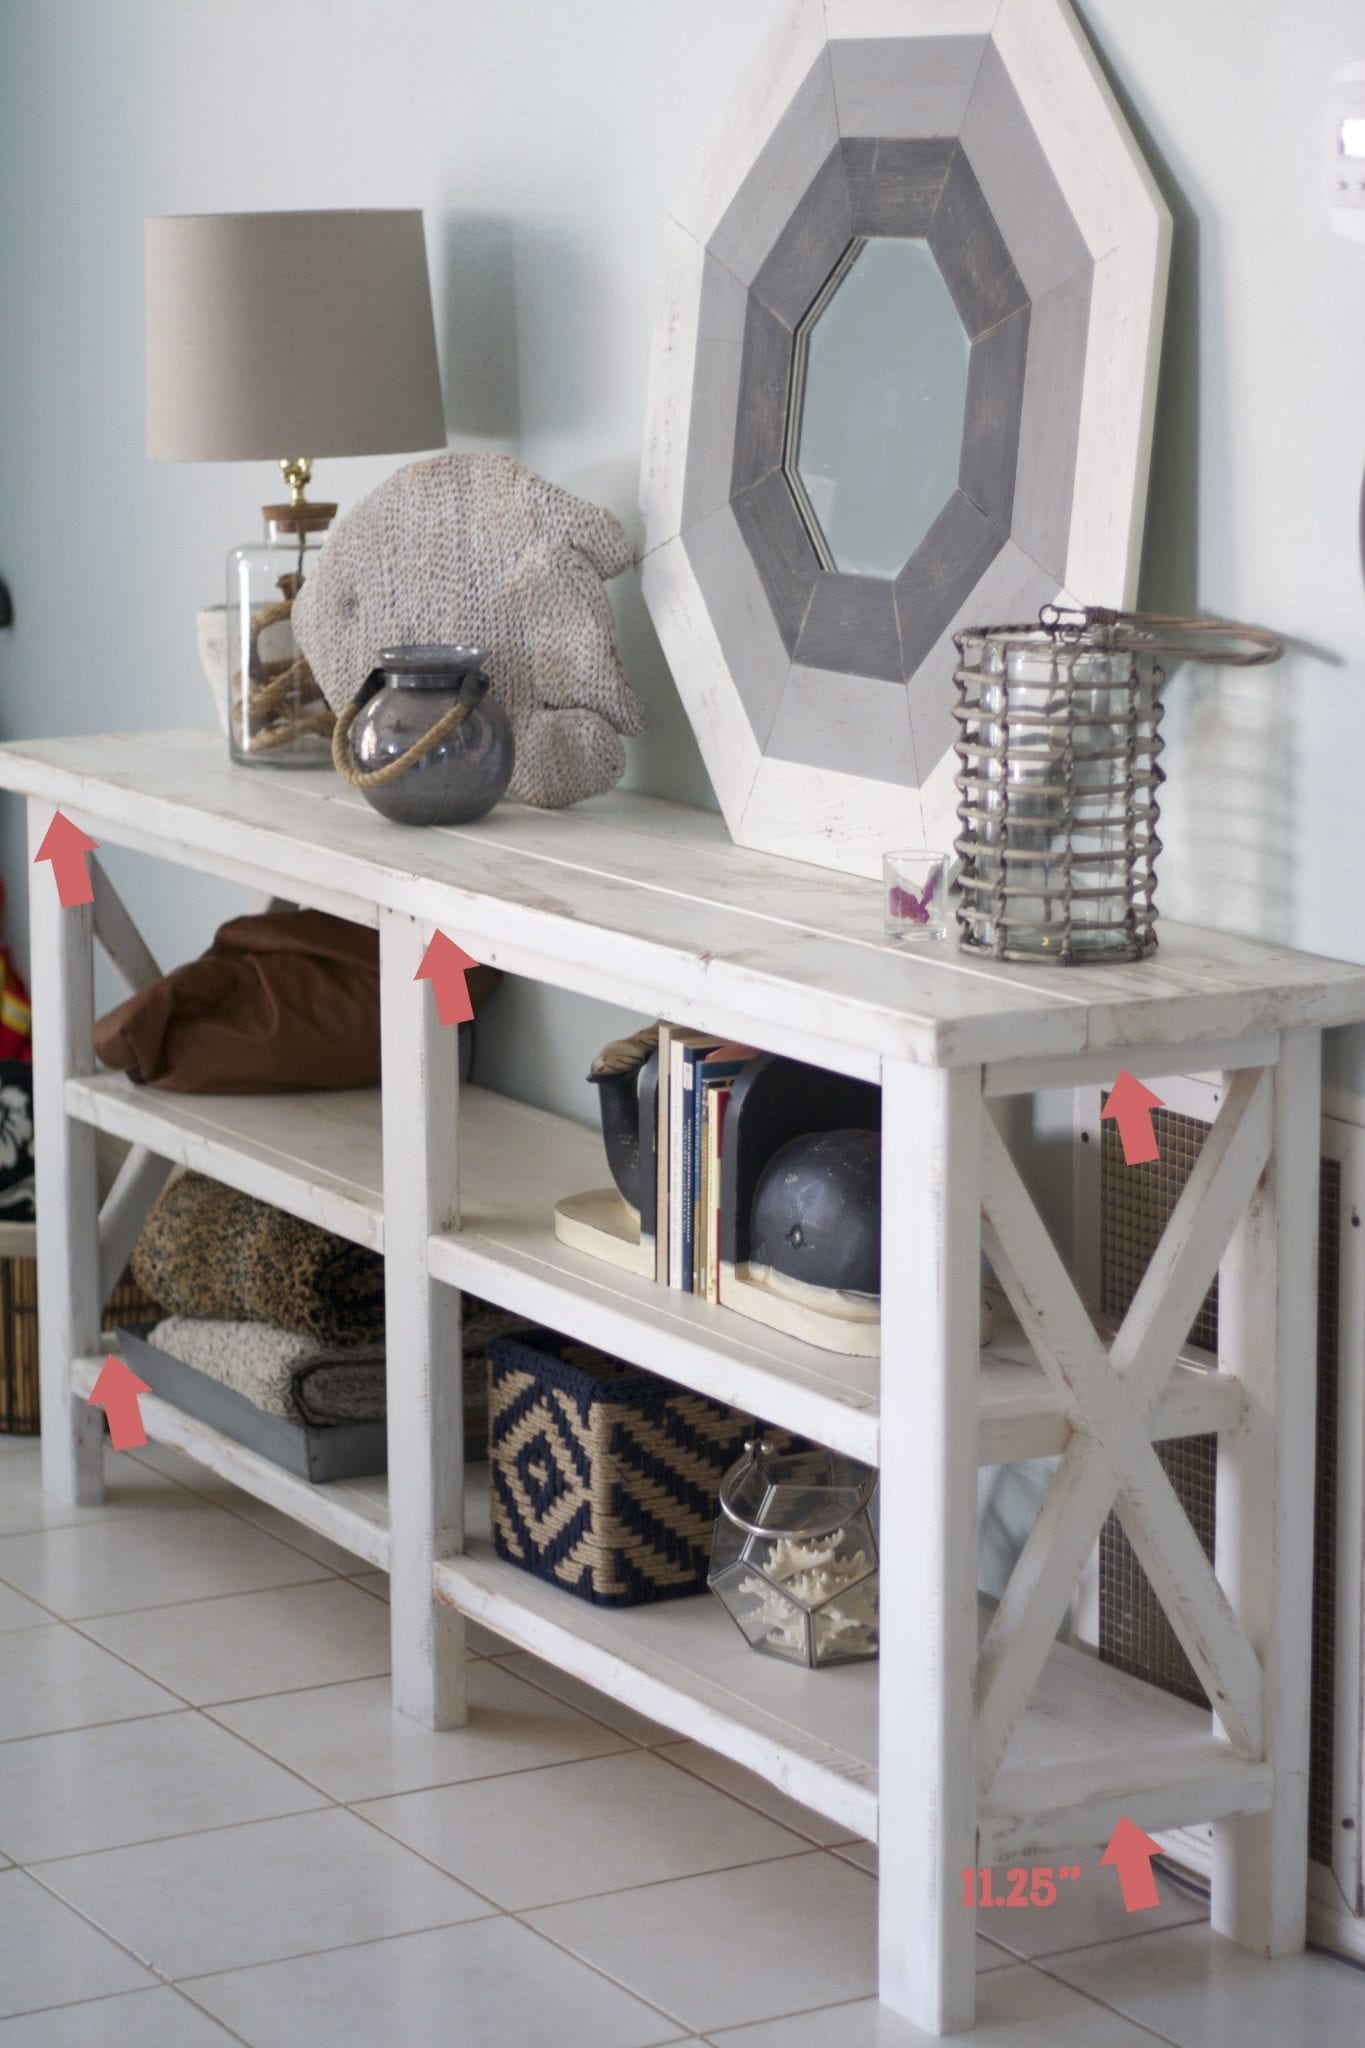
I will show you how to connect it all with the actual photo. At this point, you have your basic table without the top. What you will want to do now is add in the 5 2X4 pieces that go on the ends of the bottom shelf and support the table top. These are each 11.25″ long. Attach them with the 1 1/4″ pocket hole screws.
Next, cut your 2 2X2s that are 11.25″ long. These will go against the ends of the center shelf. Attach with 1 1/4″ pocket hole screws.
Now you have your supports and basic table, let’s put the top on!
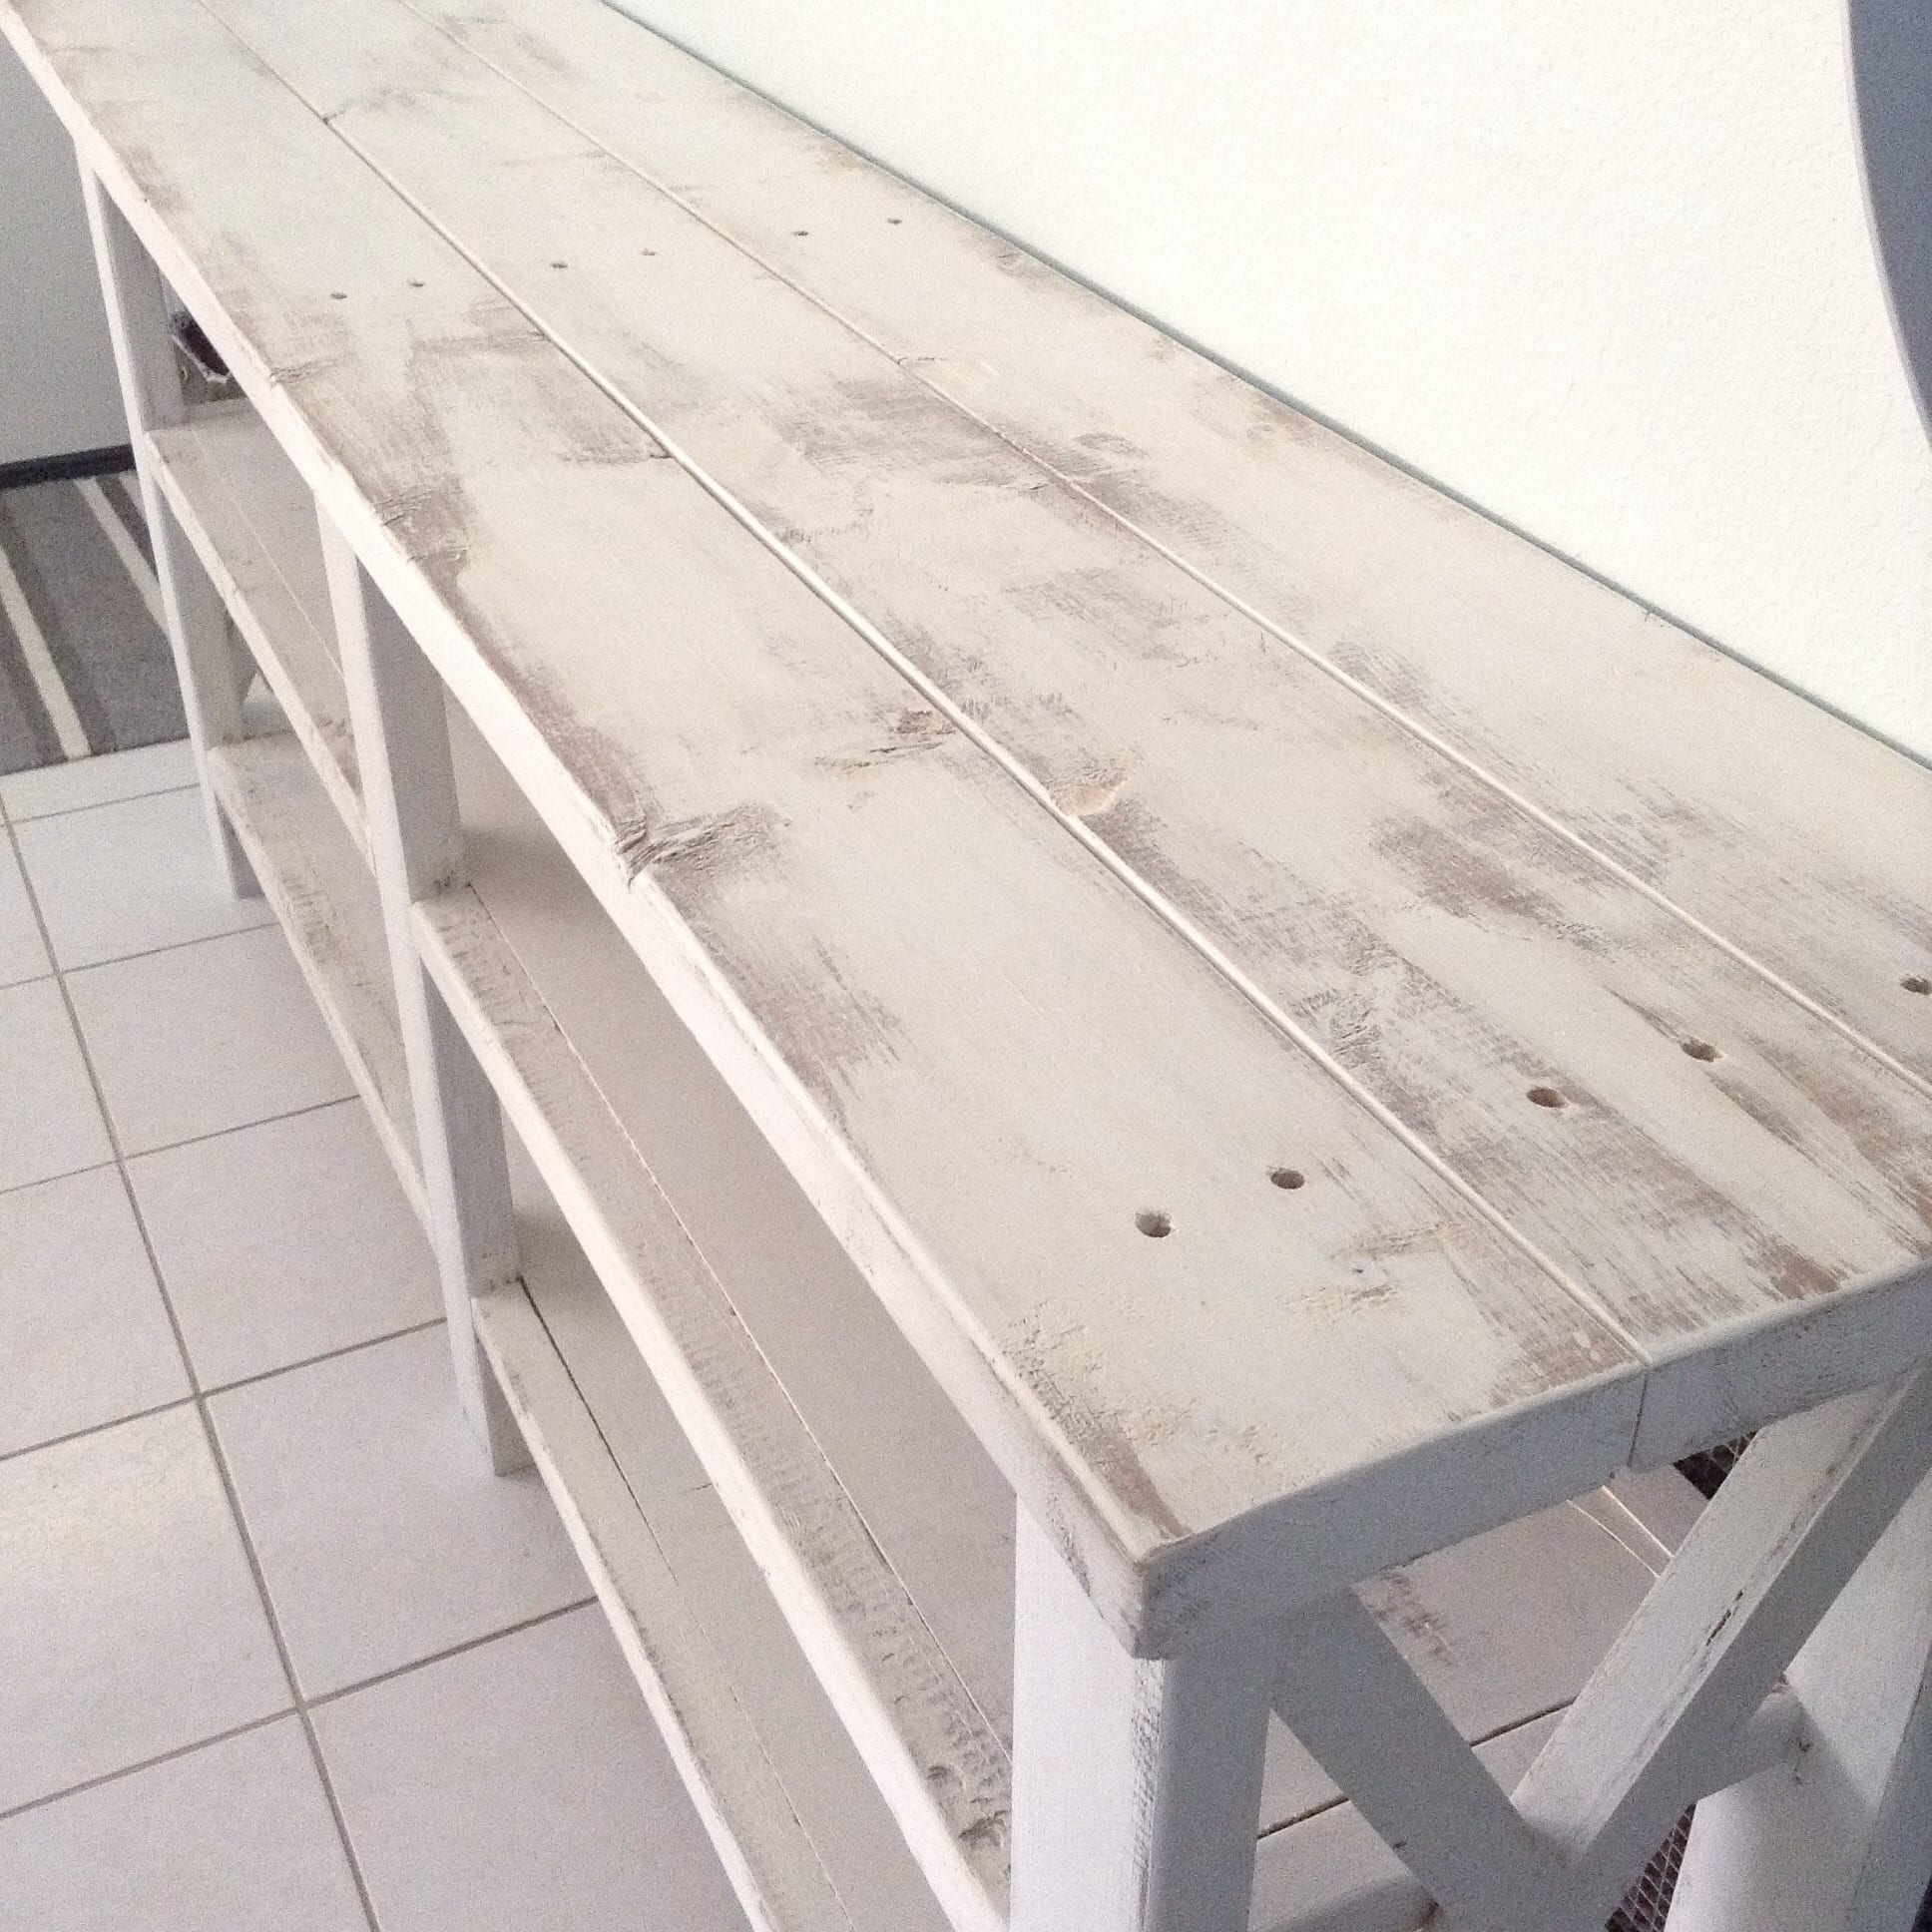
Make sure you lay your boards down (the 3 2X6s cut at 74.5″ long). Make sure they are centered from side to side and longways. I made mine so that there was more overhang on the front than the back so that I could move it closer to the wall. Just measure each end and side so that you have the same amount before mounting them to the table. To do this, we drilled holes through the top pieces to go into the 2X4s and attached using the 2 1/2″ pocket hole screws. We wanted the top to have a natural looking, rustic feel with the holes. You can choose not to do this and attach them from underneath…personal preference.
Once you have those attached, you are ready to cut your X pieces on the sides. This is where you will use your miter saw. These cuts are a little tricky, so you have to make sure to pay close attention to your measurements and how you are cutting your pieces. The specific directions for the cuts are in the cut list at the top. Once you have those all cut, you will have one long one and two short ones on each end. We attached them with wood glue and they are mostly decorative pieces and provide little support.
We attached the long one with screws and the short ones with wood glue. Once these are attached, allow time for everything to dry that you used glue on. Sand all rough edges.
Now it’s time for staining and painting! Get your vinegar and steel wool mixture and remove the pads. Use a lintless cloth to apply the vinegar. Once it is on, it will darken over time. Mine produced somewhat of a rusty brown color.
Once this has dried, start painting your console. I didn’t give it full coverage. I added it on in streaks and once the paint on my brushed thinned, I streaked it over the areas that are more bare. This gives it the distressed look without the additional step of sanding. Add a second coat of white paint over the areas that do have full coverage and allow your paint to thin on your brush and go over your bare areas again.
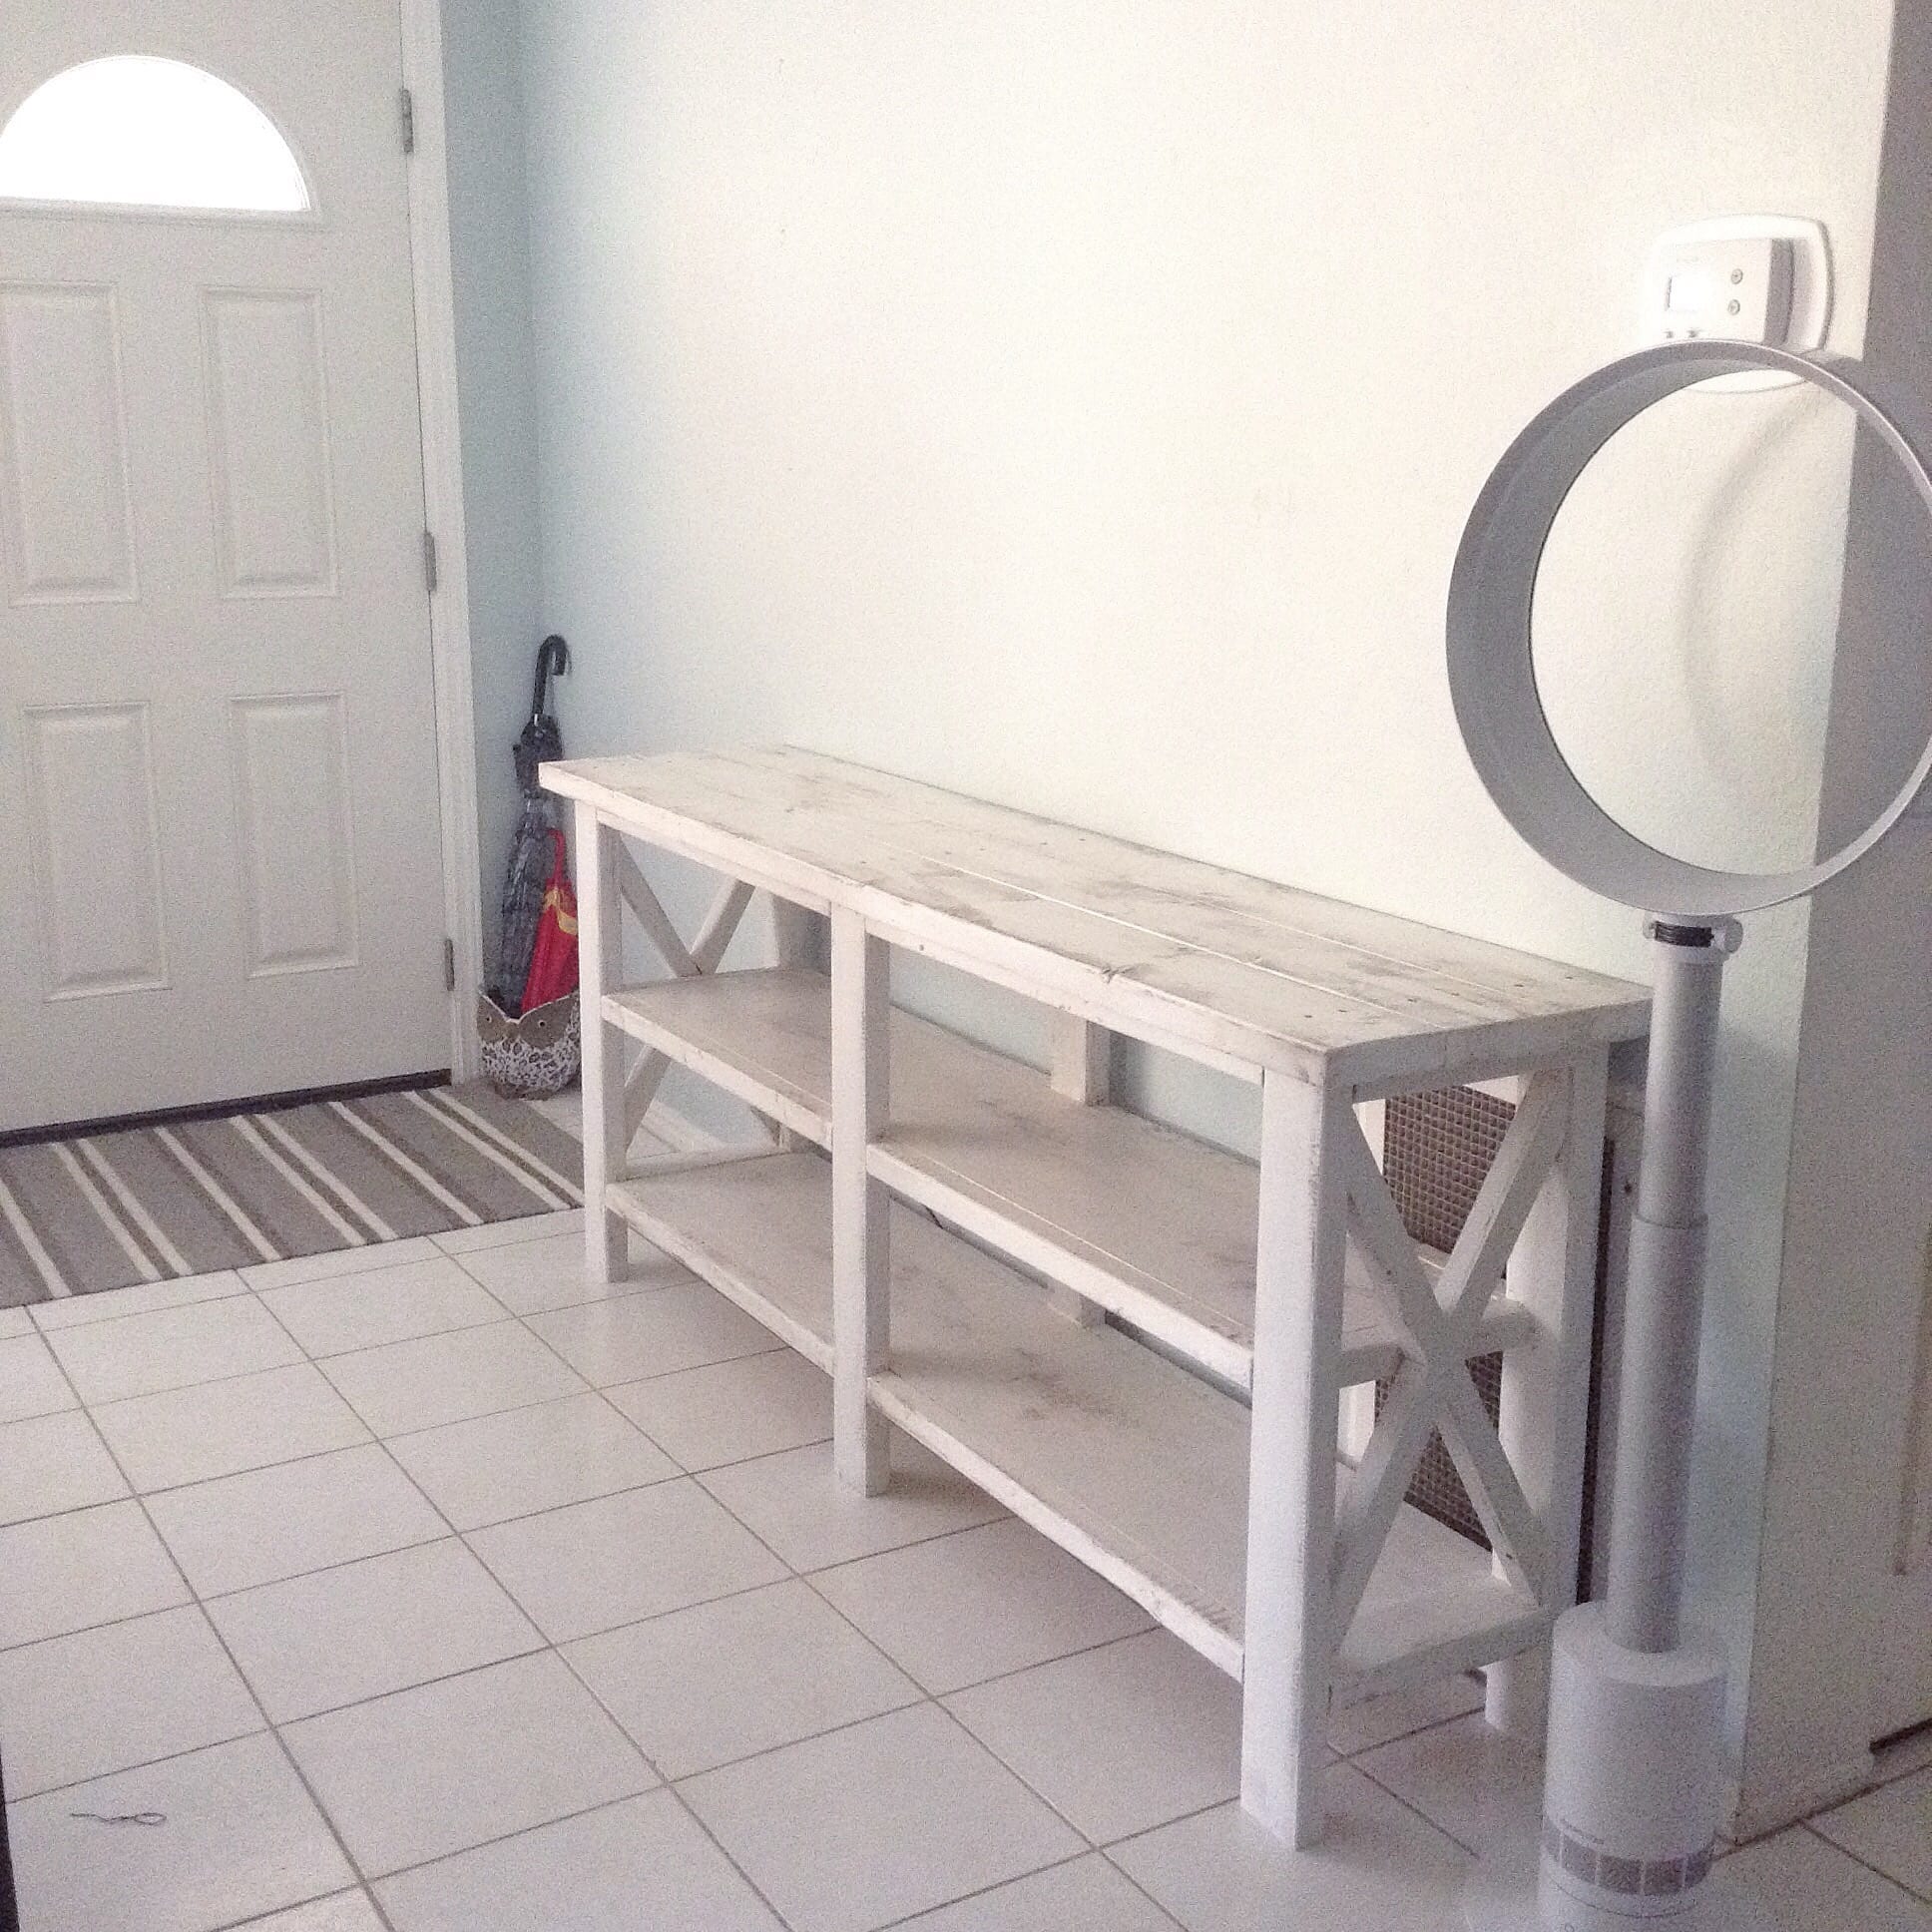
Once you are satisfied with the color, allow time for the paint to fully dry. Then apply Johnson’s furniture wax to seal it all.
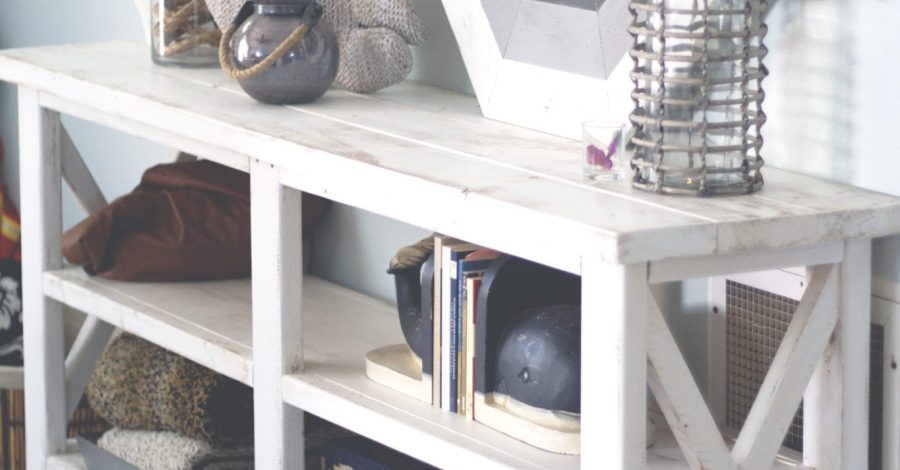
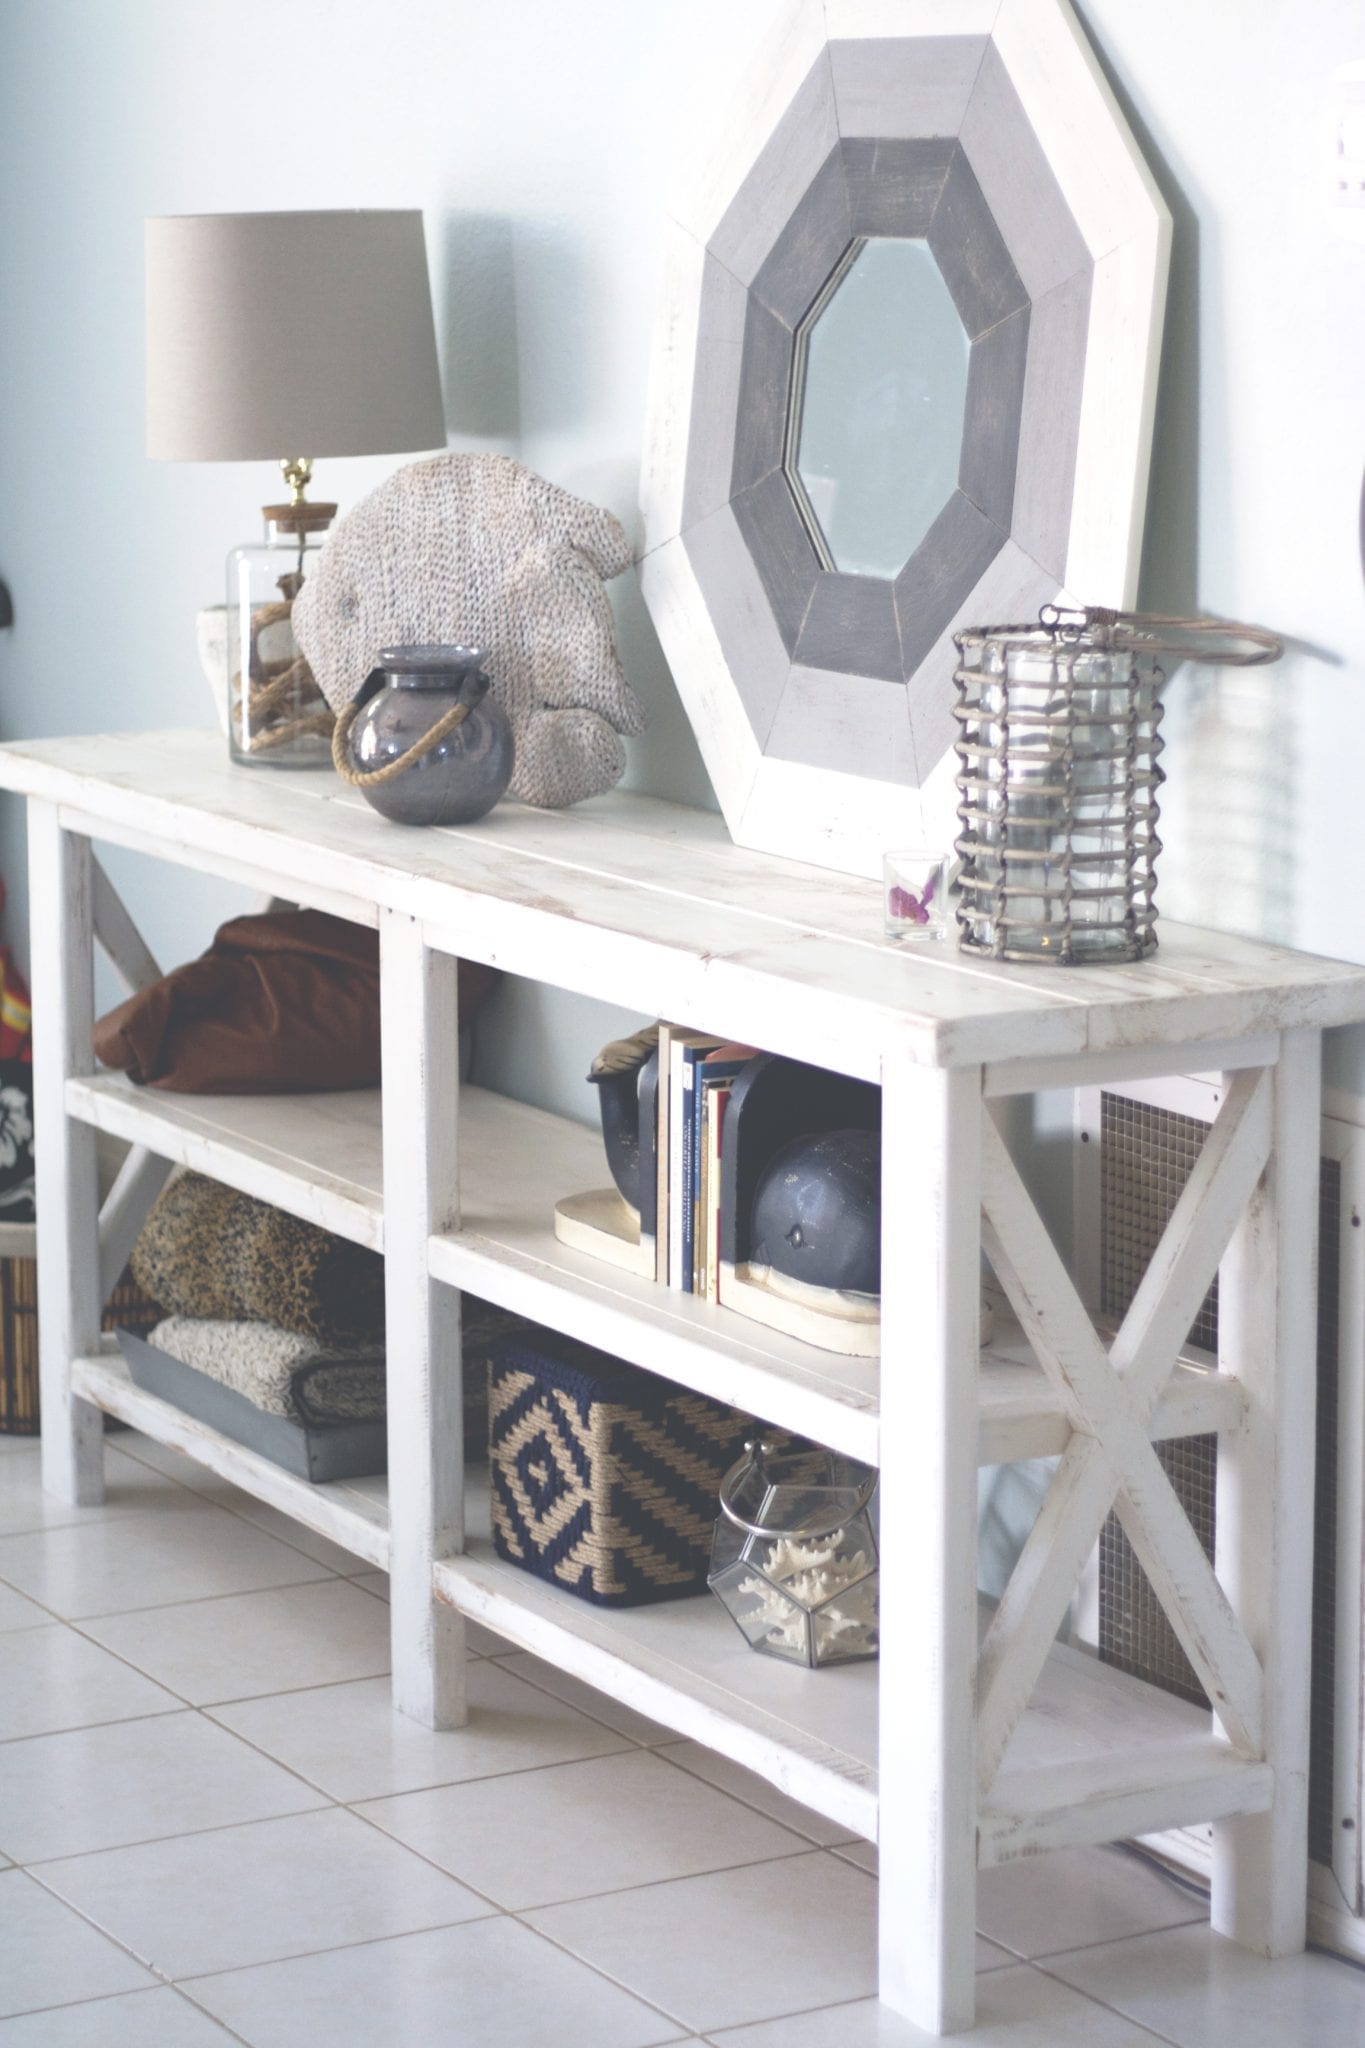
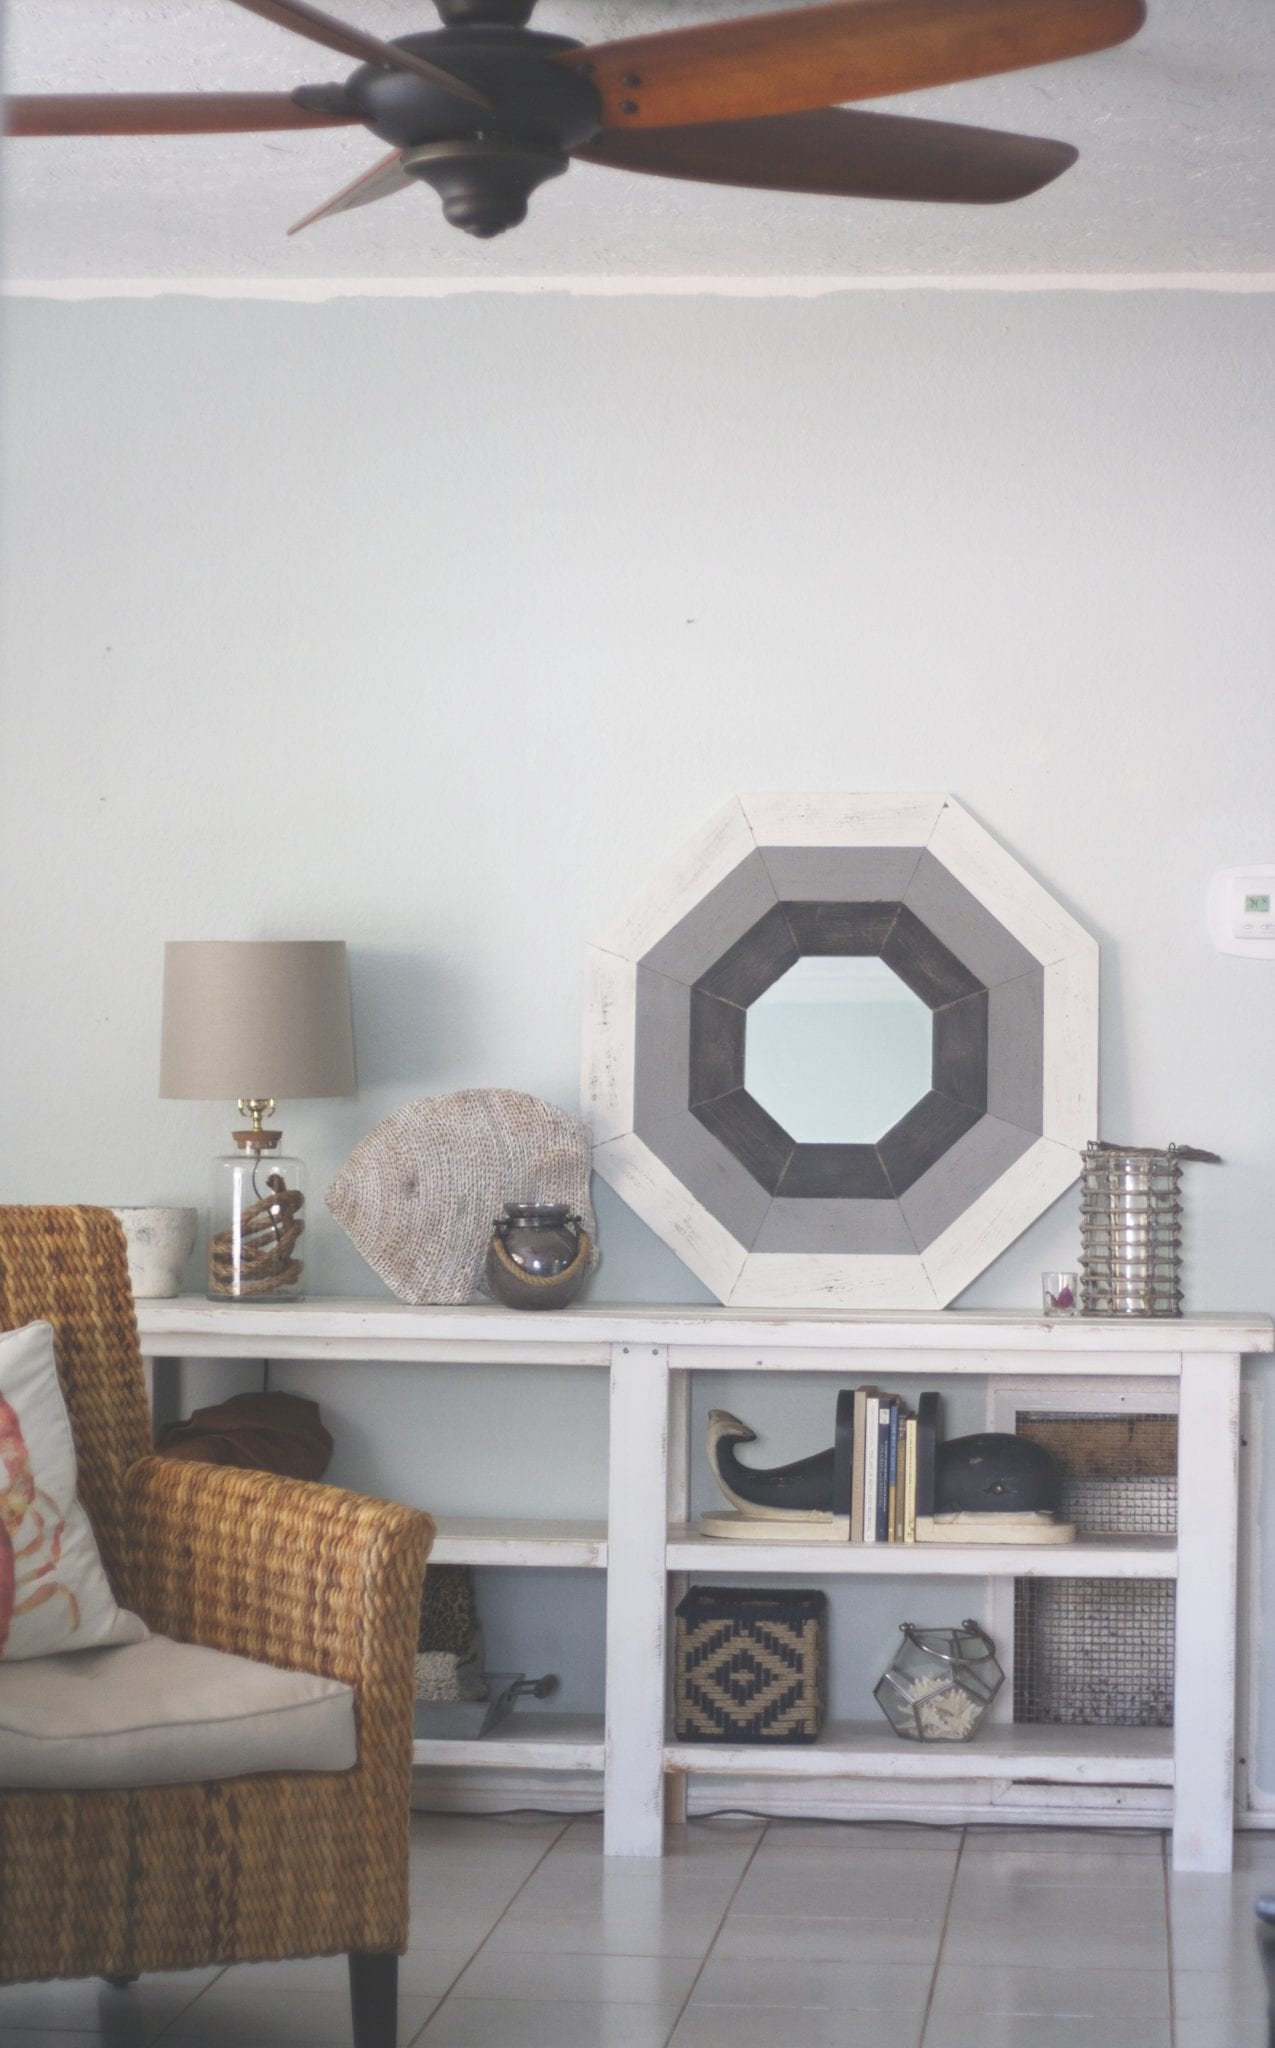
You’re done! Now pat yourself on the back for conquering such a fun and rewarding DIY!

2 COMMENTS
Modern Day Moms
11 years agoThis turned out awesome!!!!!!!!
robi
11 years agoi love you blog!!