
This is a simple and inexpensive DIY project that your kids could do, although it isn’t recommended as there is a sharp tool involved. But for those of you who may not be so inclined in the crafty department, be excited in knowing that there is something even you can do!
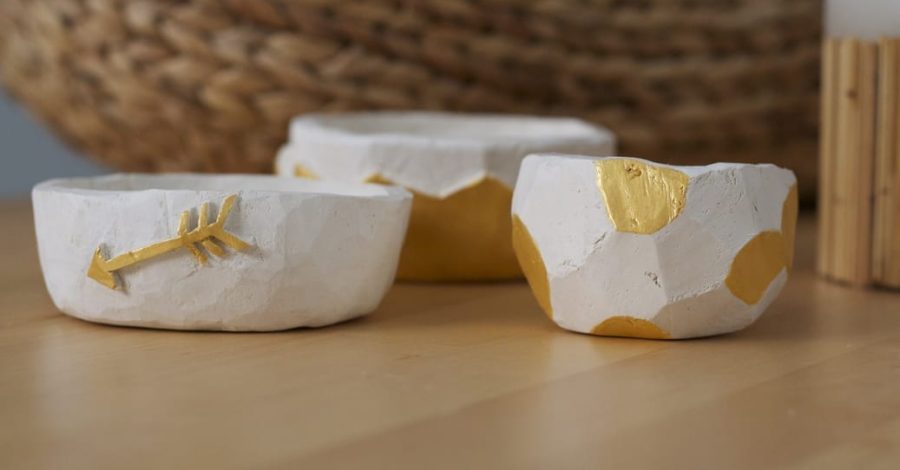
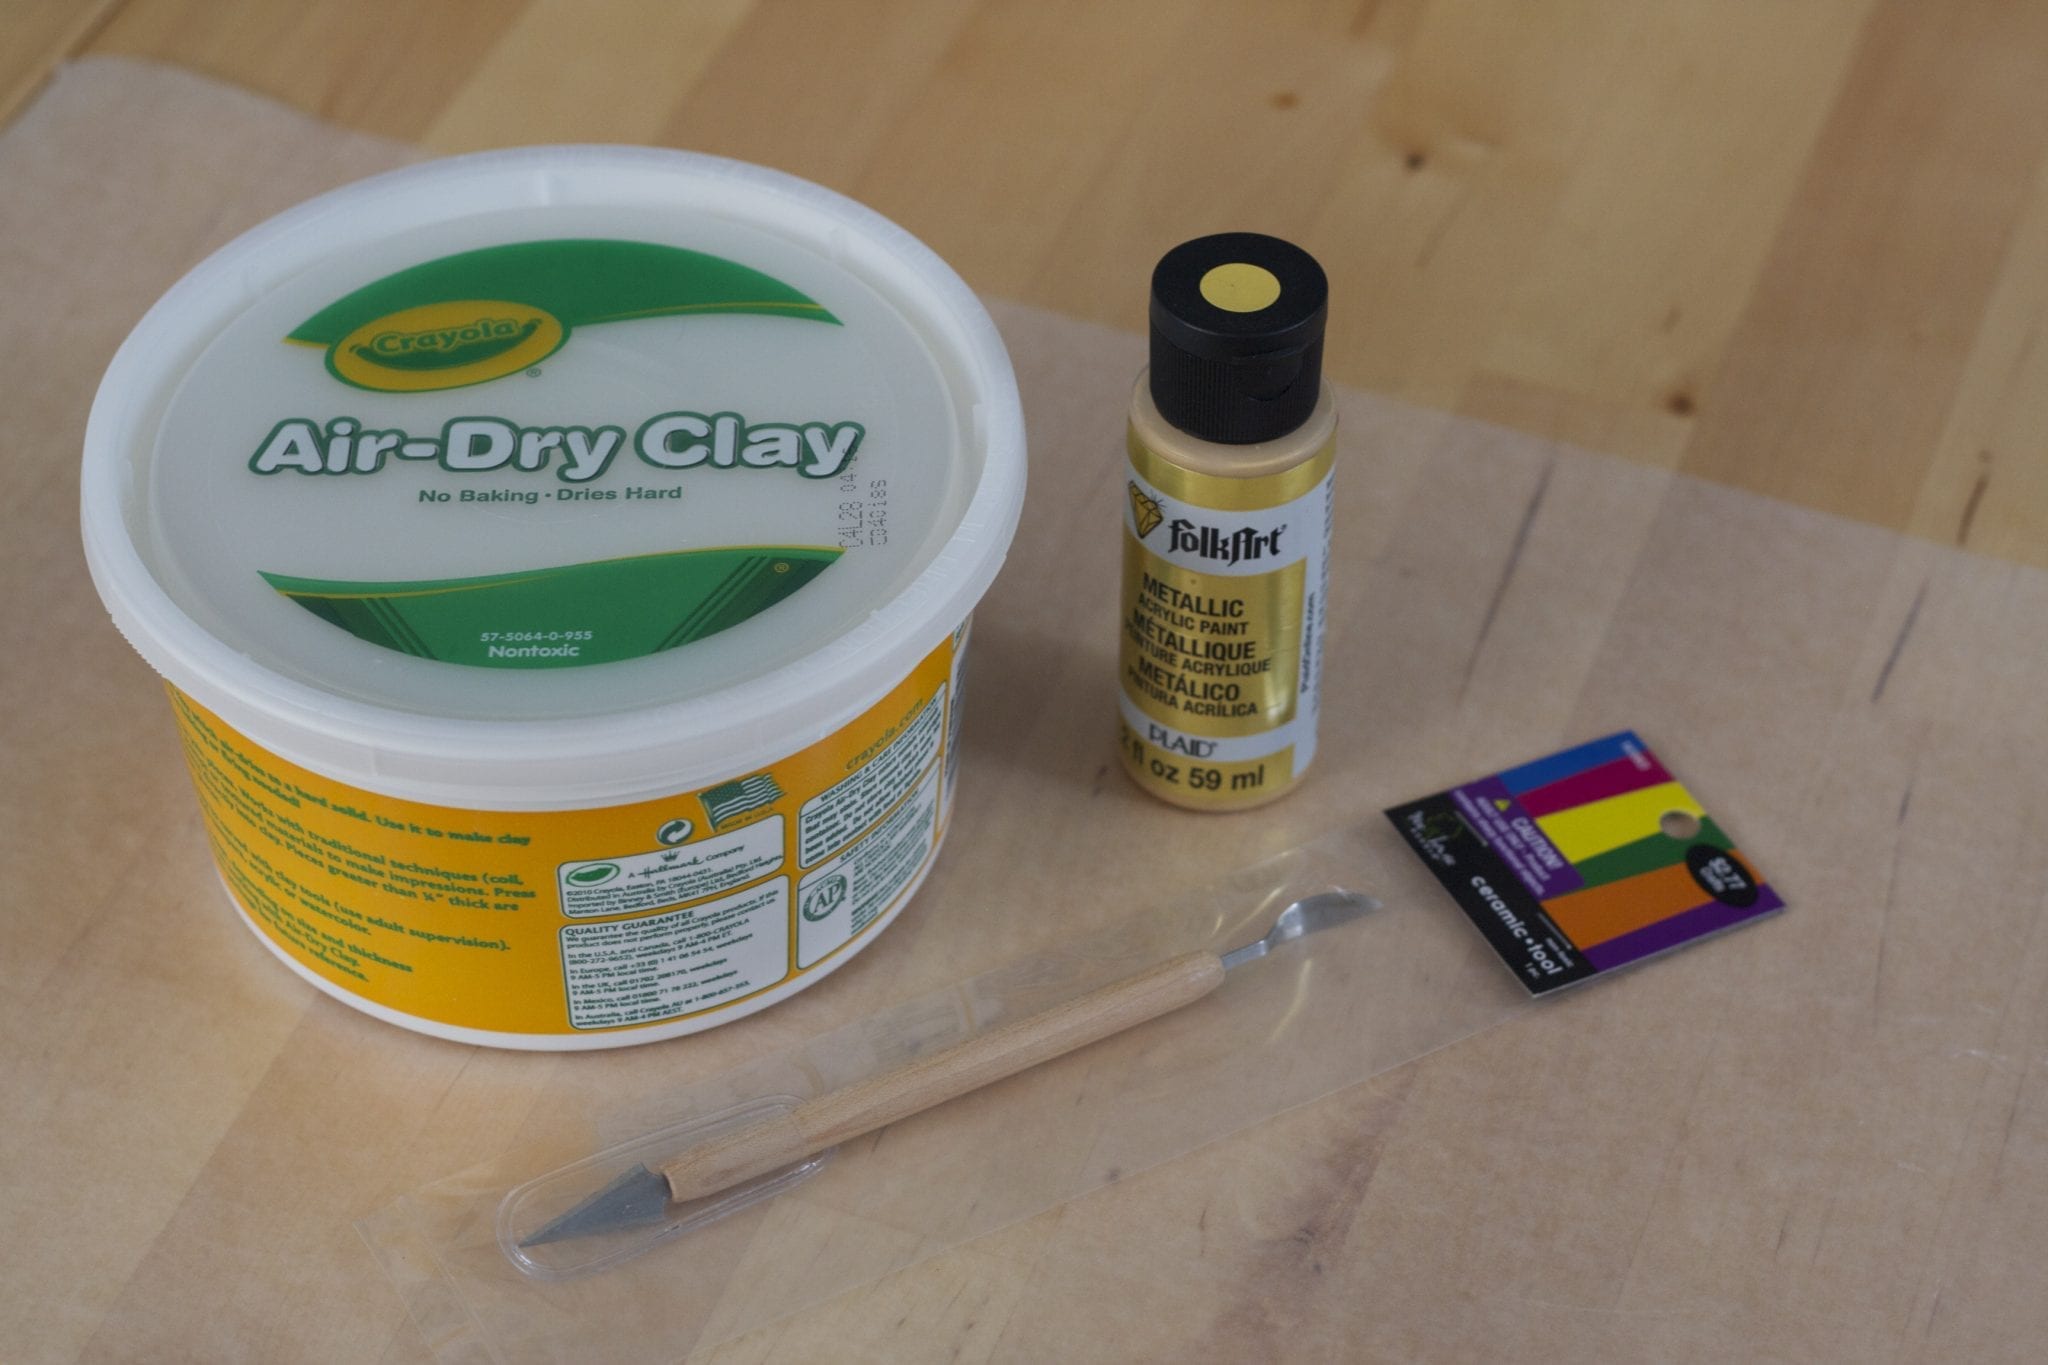
For less than $11, you can create these 3 clay bowl designs without using a kiln or baking! These are air-dry. Amazing, right?! All you need is Crayola’s Air Dry Clay, a cutting tool and some acrylic paint. Initially I was going to use Liquid Gold Leaf paint, but upon further investigation, it seems that it works best on non-porous, smooth surfaces. You could use a coat of paint similar to it on your bowl then apply it, but I figured that I would use a similar color and just keep things simple. I found FolkArt’s Inca Gold to be very close in color to the Liquid Gold Leaf.
If you are smart, you can purchase your clay at Hobby Lobby and use the 40% off coupon, making this project even cheaper!
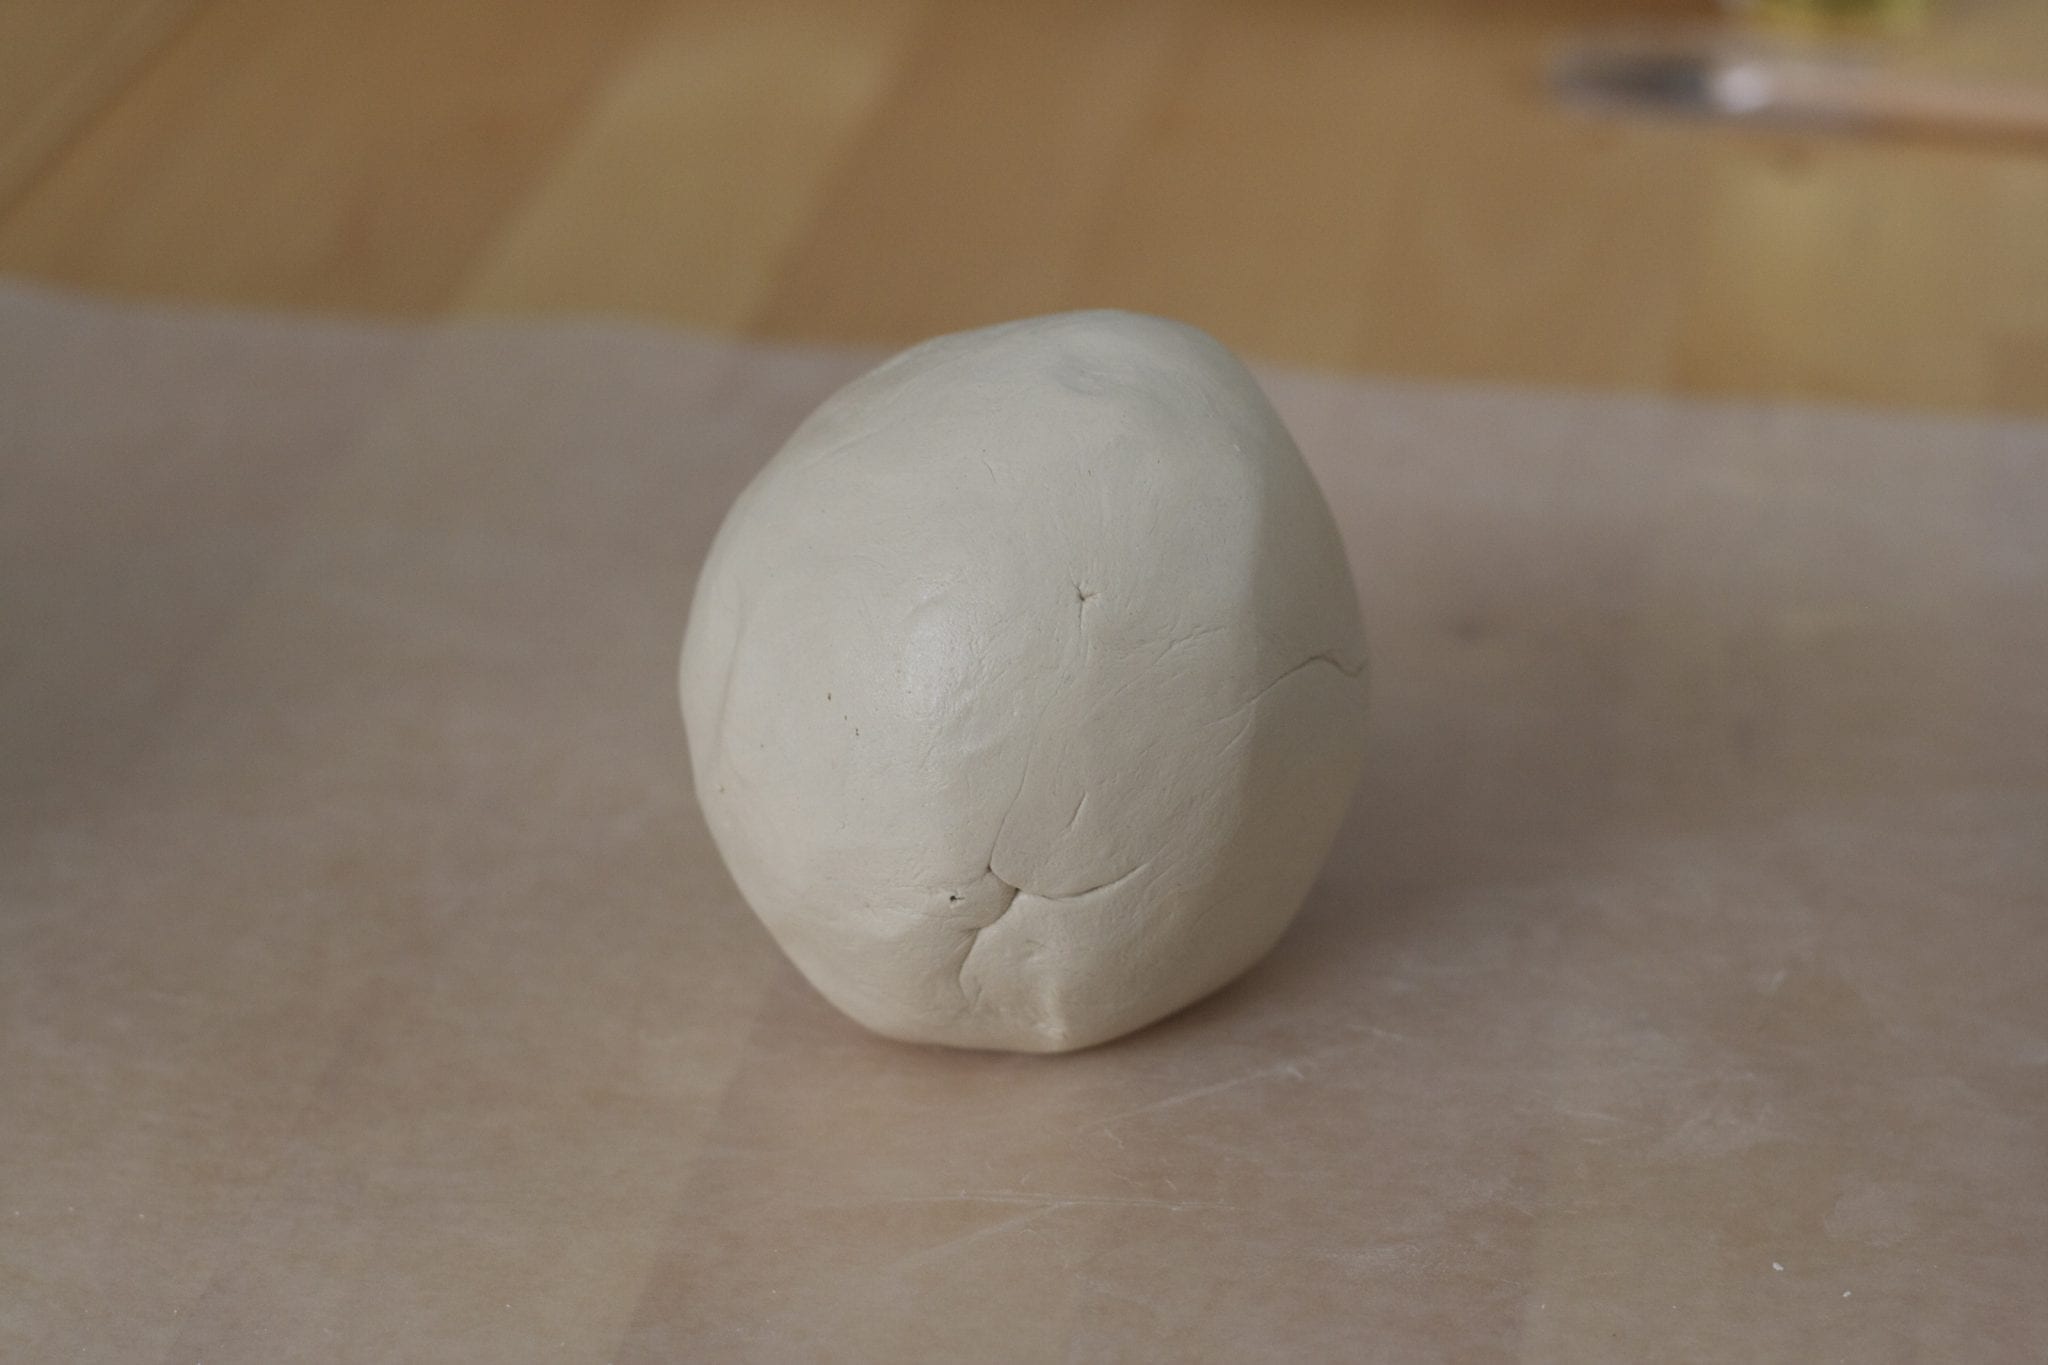
To begin with, break off a chunk of clay from your bowl. I broke off about 1/3 as we are making 3 bowls. First, I am going to shape the geometric bowl. You want to roll it into a ball.
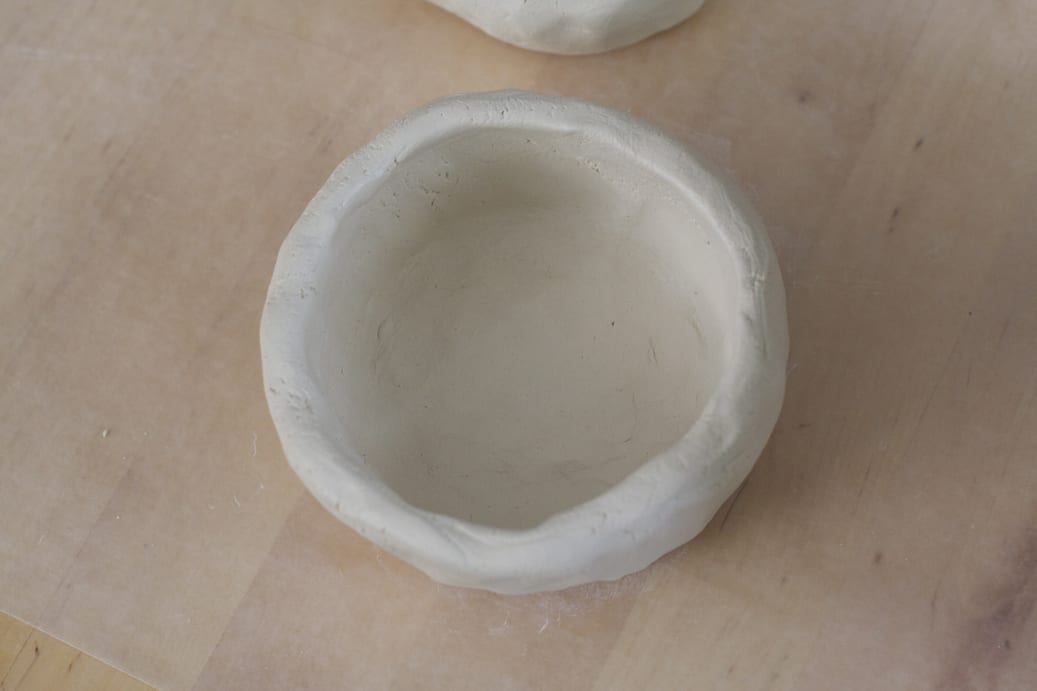
Next, dig your thumbs into the center to begin creating the pot part. Remember doing this in art class in middle school? Same thing.
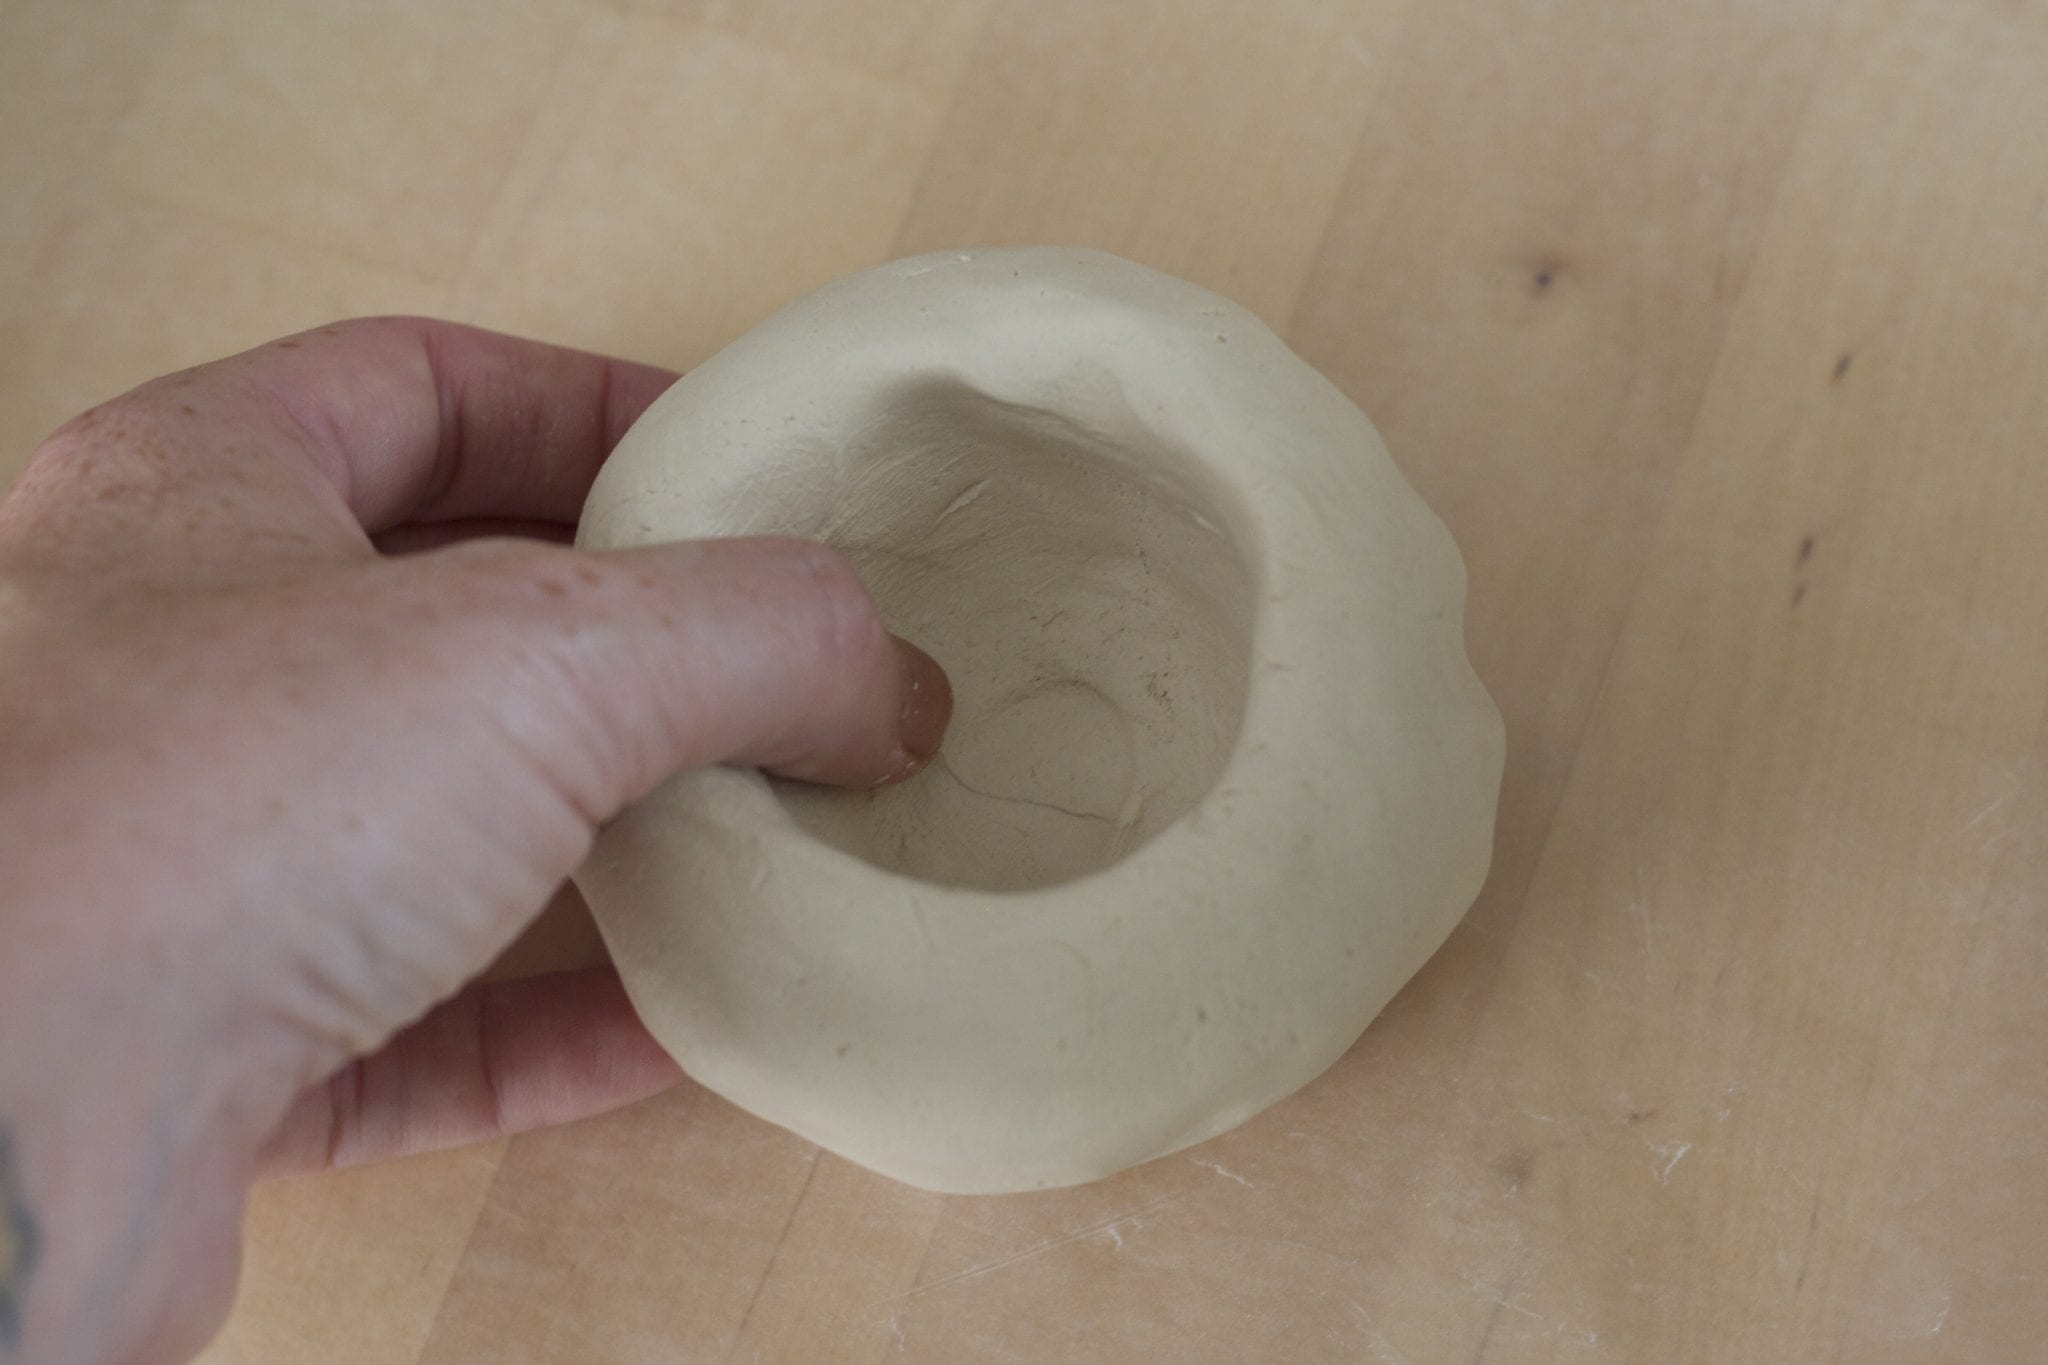
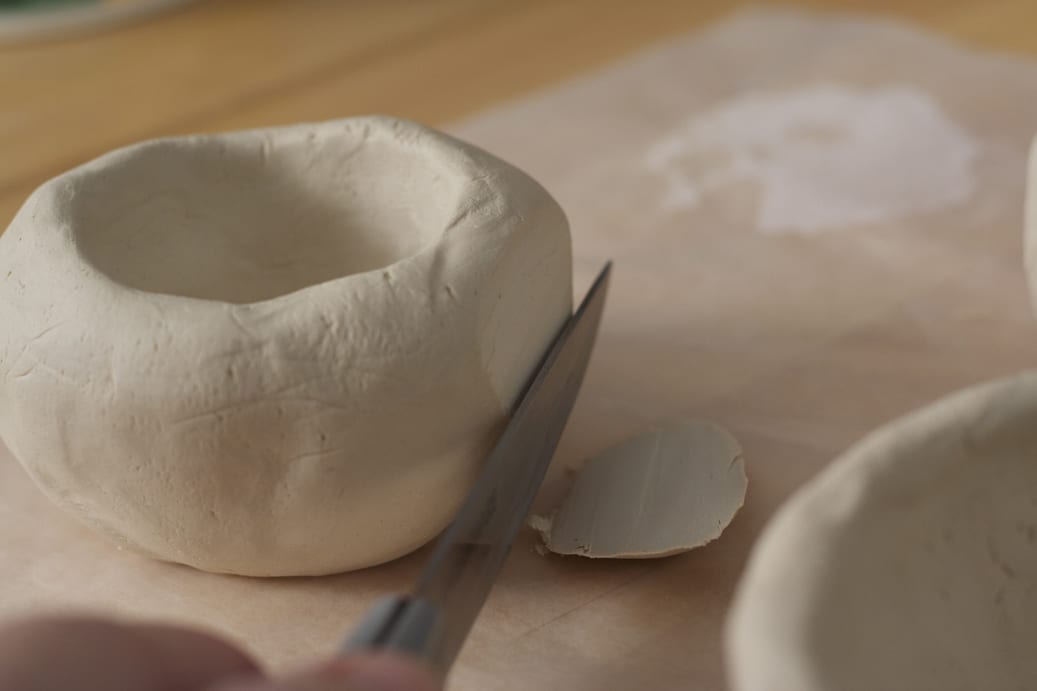
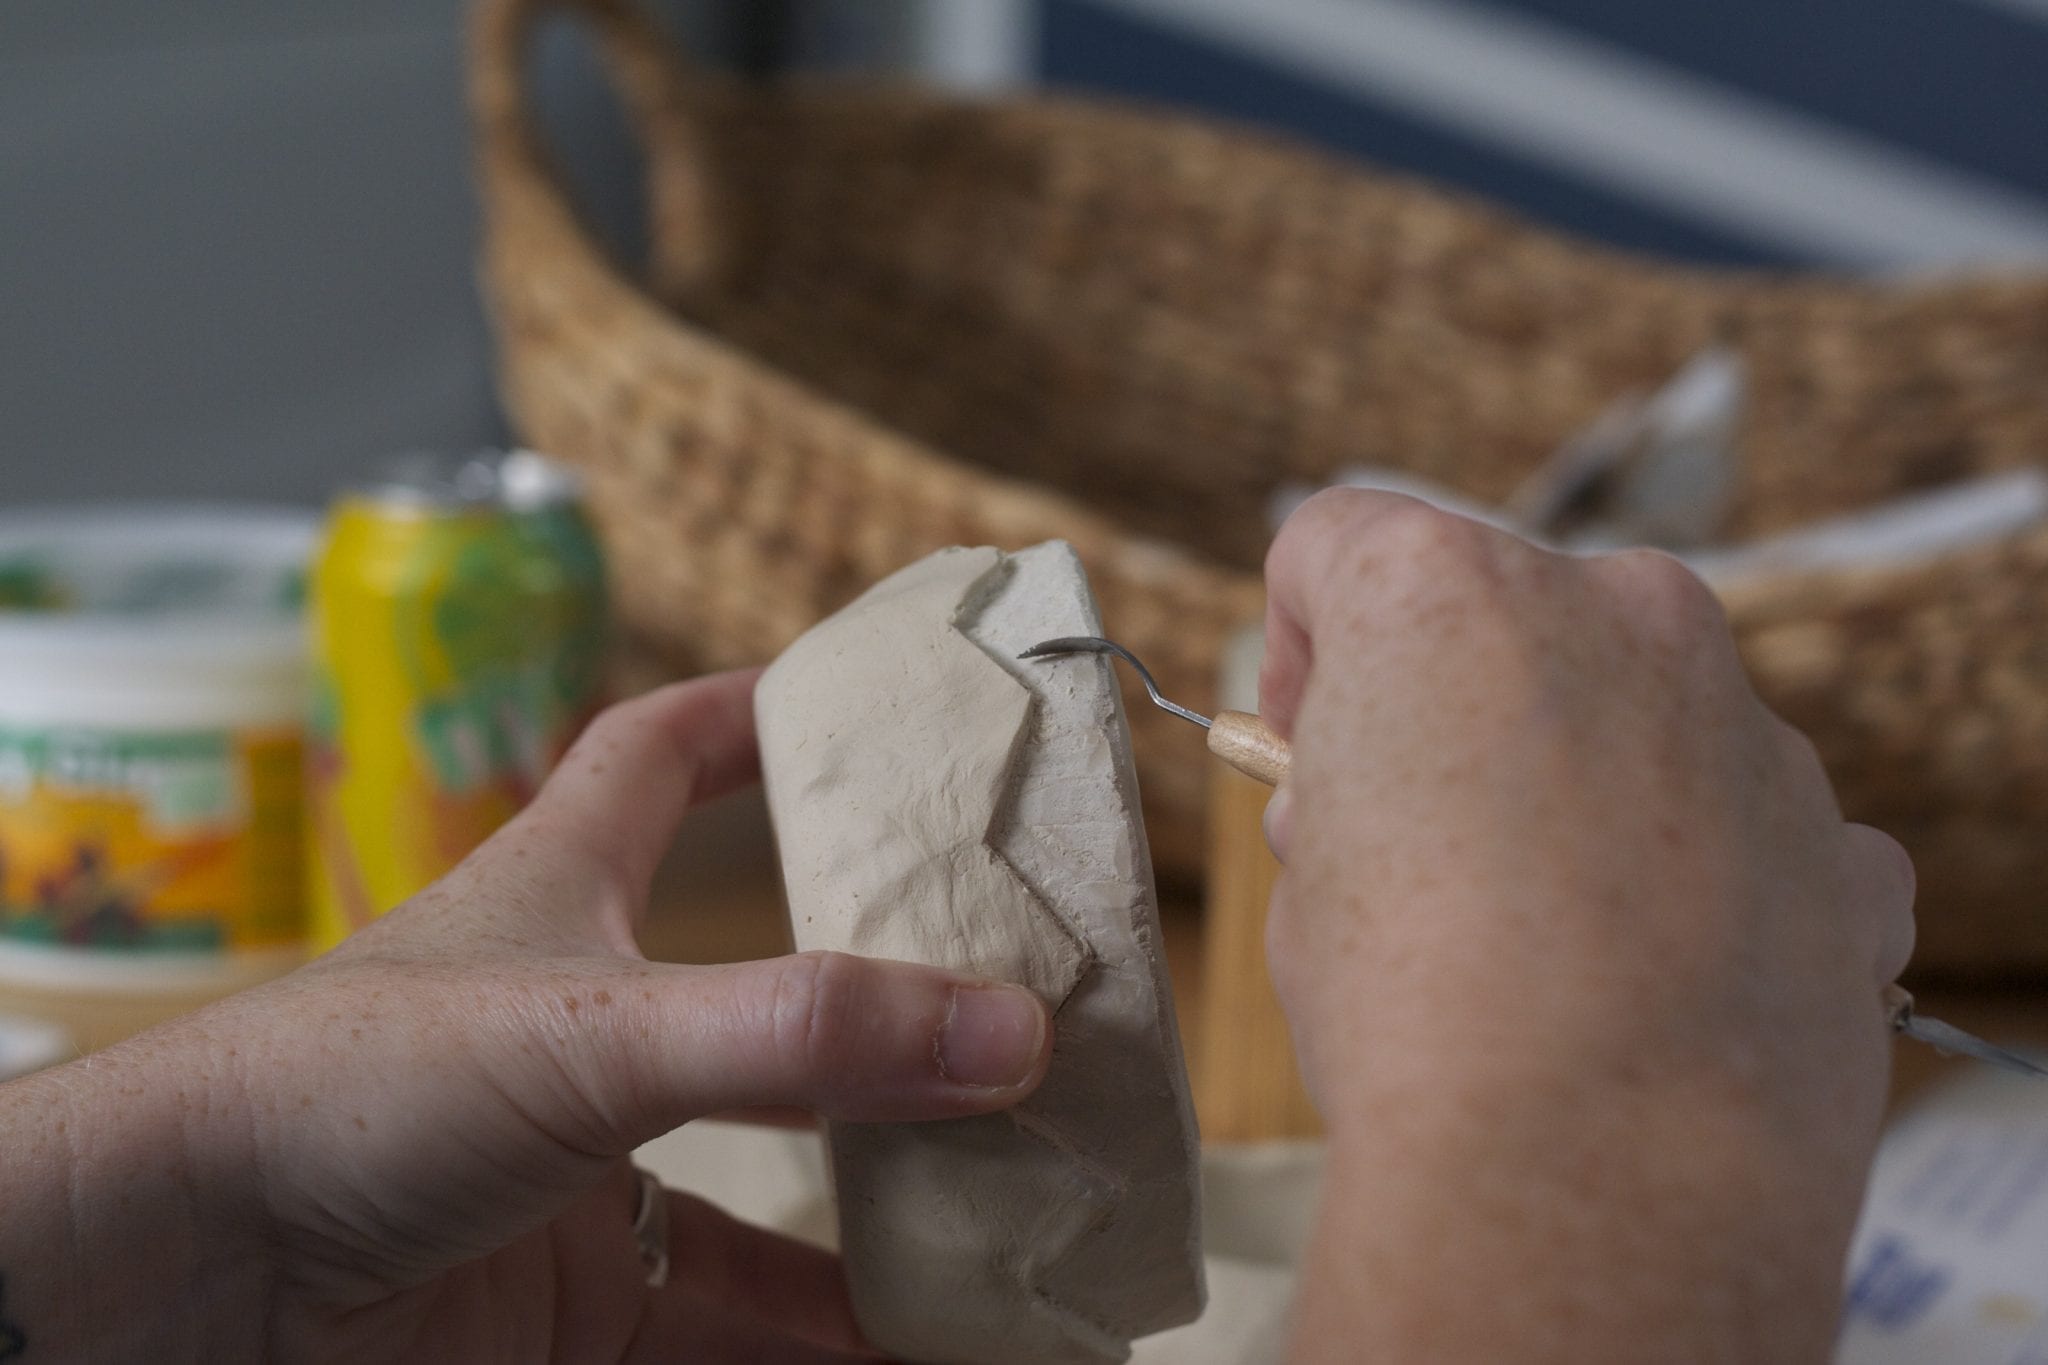
Leave the sides thick so that when you start shaving off pieces to create the faceted effect, you won’t make it too thin.
Next, I used one of my kitchen knives to cut the faceted parts off because the clay tool was too small to make the cuts I needed. This stuff is nontoxic, so I felt comfortable using my kitchen utensil for this. I just used antibacterial soap to wash it when I was done.
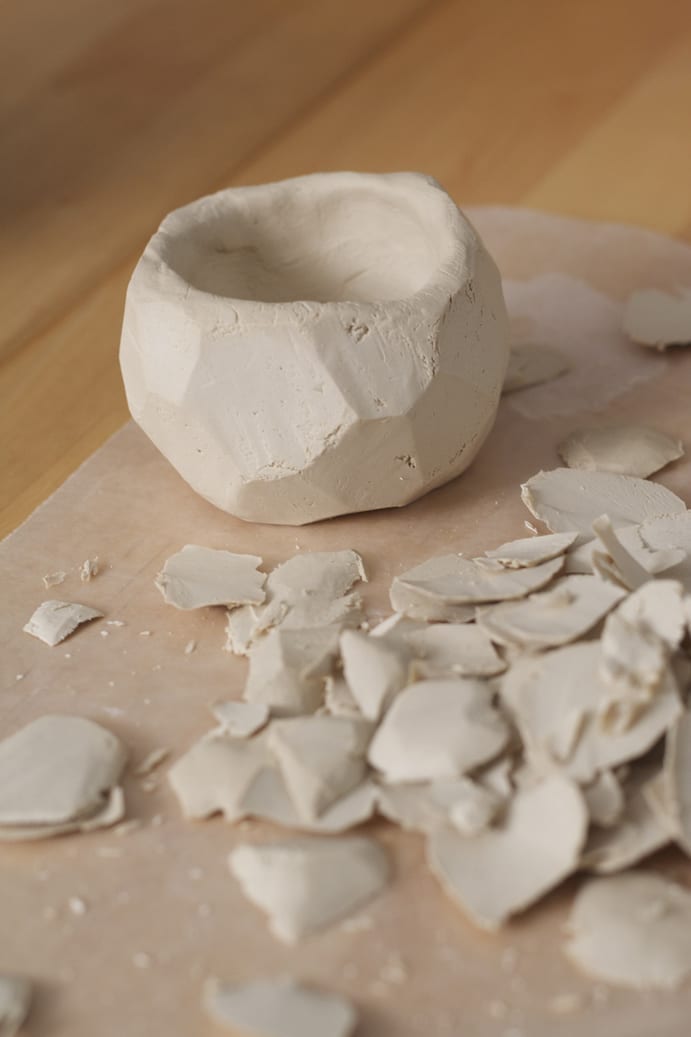
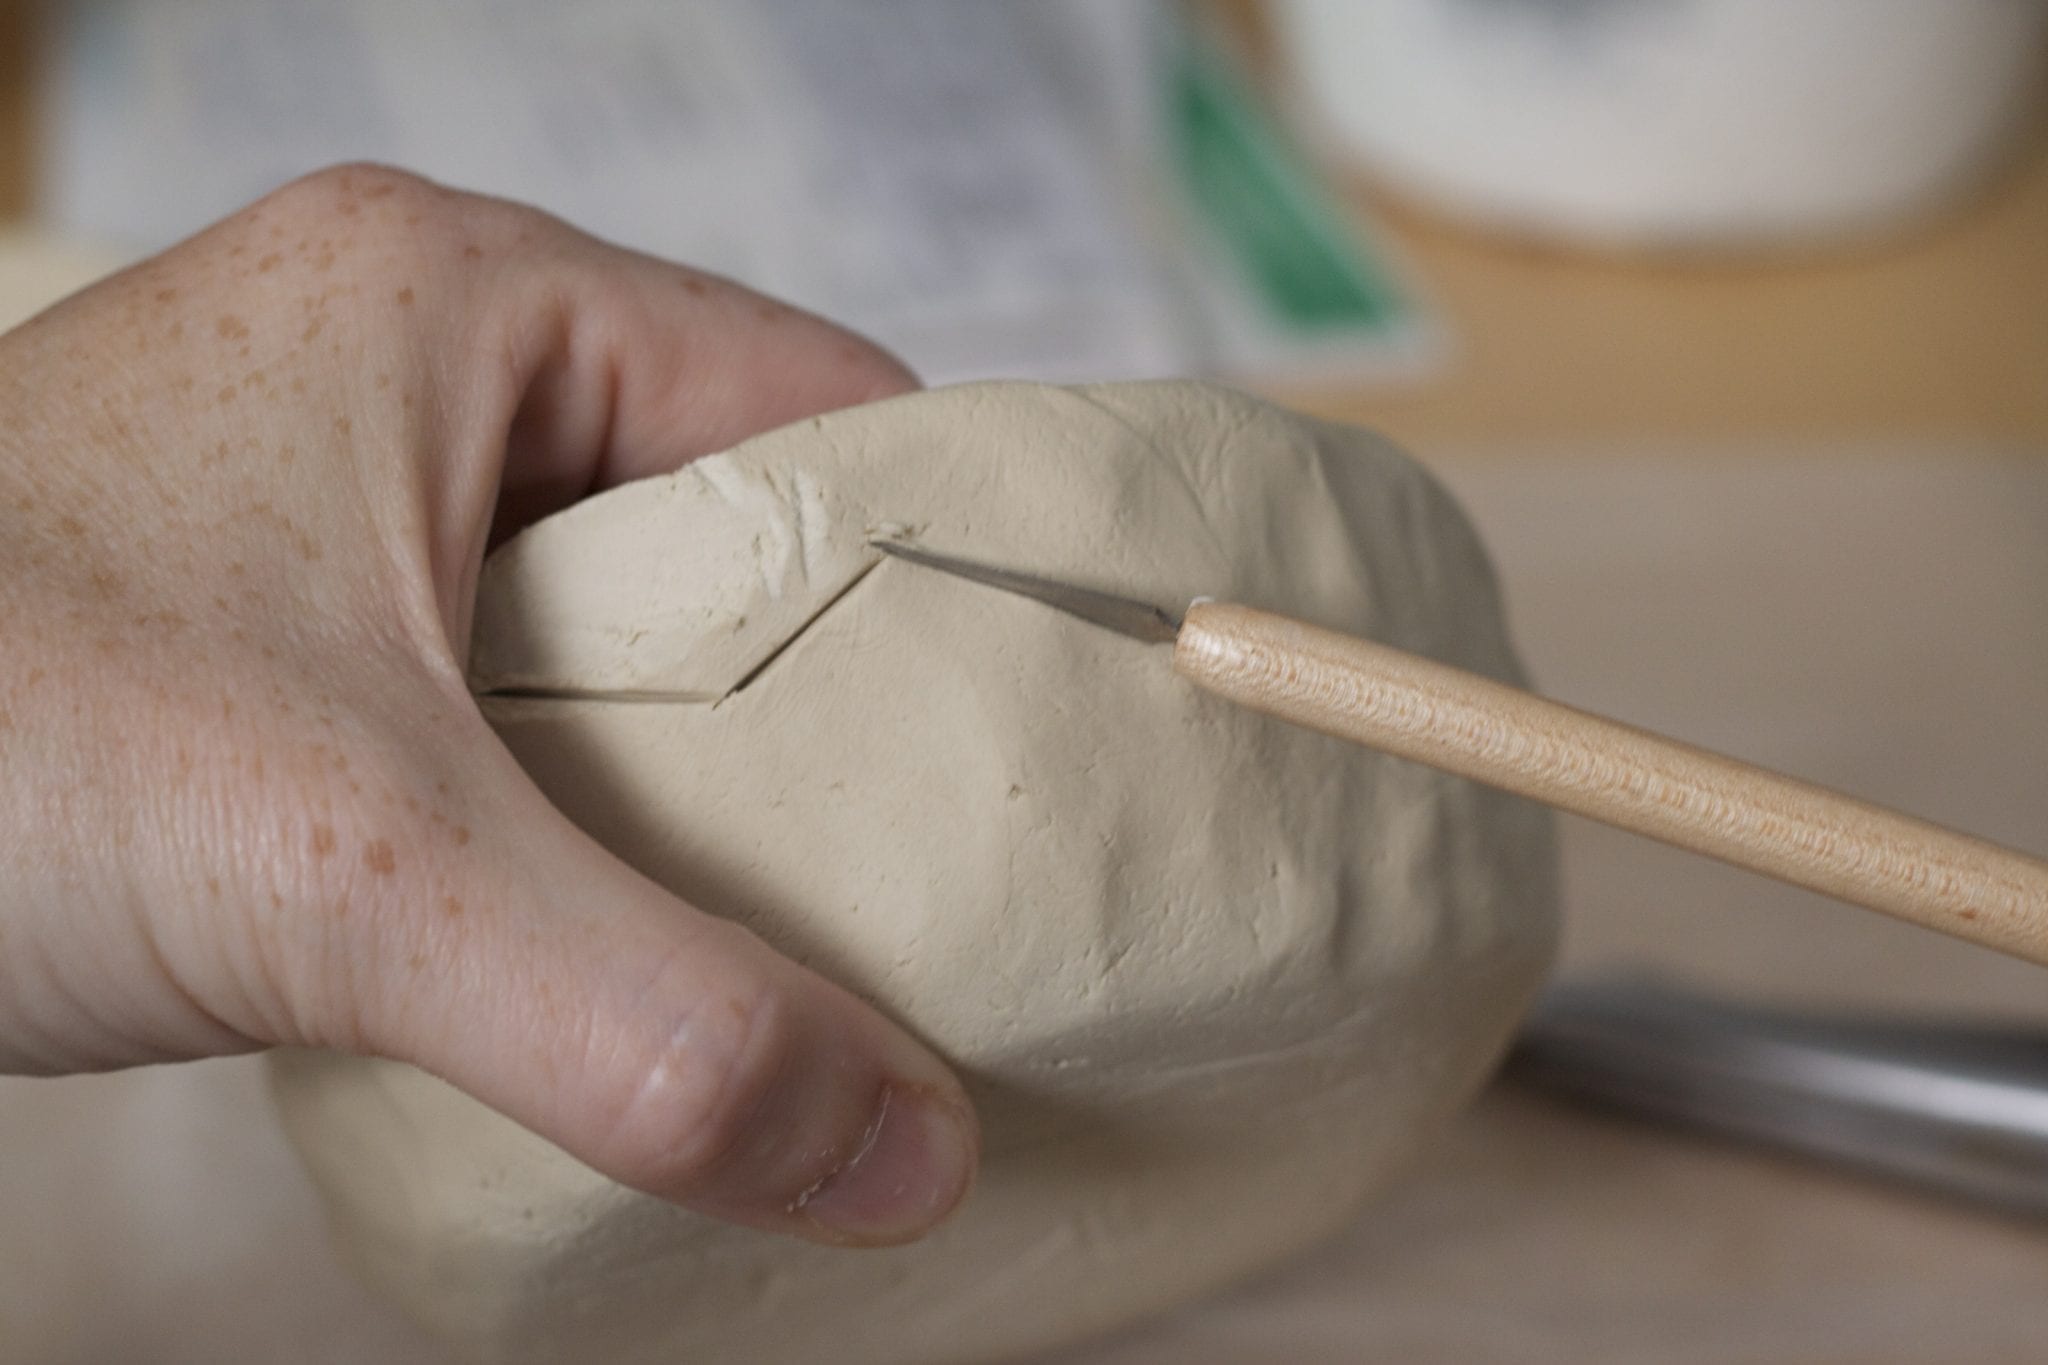
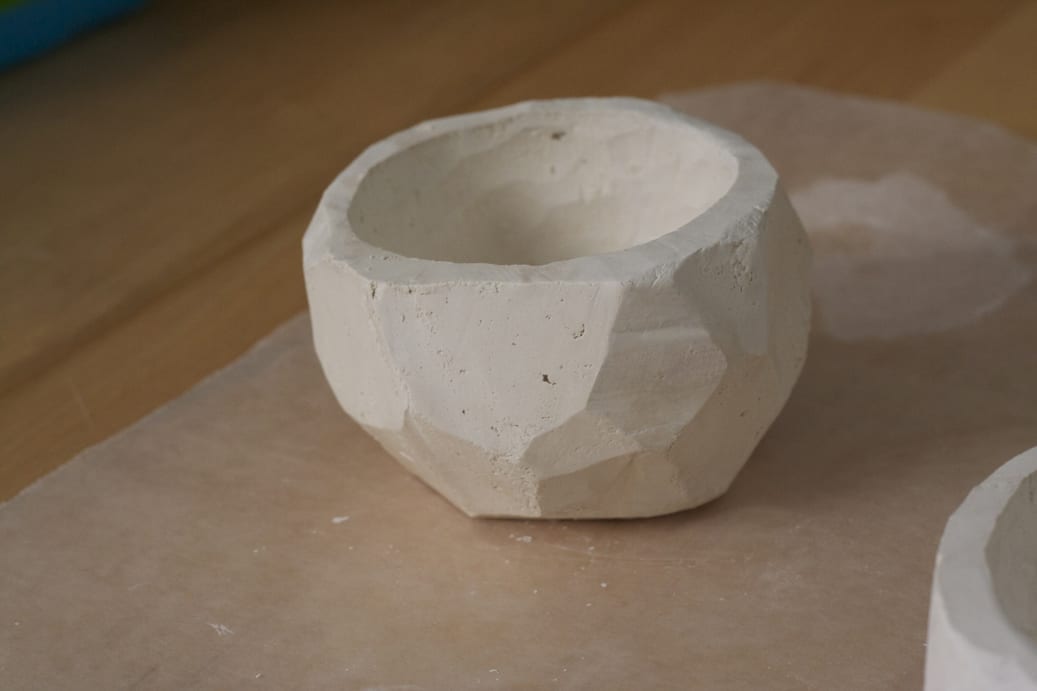
Once you are done, it should look something like this. Now leave it to dry and move on to the next. Repeat the first two steps. When you begin to mold out your bowl, leave one side thicker so that you can carve out your arrow. My biggest tip for this bowl is to not wait too long to begin carving…maybe 14-16 hours, as this one is likely to crumble since the quill is delicate. You can see that parts of mine fell apart because I let it dry too much (22 hours).
Finally, mold out another bowl for your chevron style – or Charlie Brown bowl, whichever you like. Make sure to leave it thick enough all the way around so that you can carve out your design.
The possibilities are endless with these! You could even purchase cookie cutter designs or clay cutter designs they have available at Hobby Lobby. This clay is not recommended for food or water use, but they sure would make some excellent office supply holders! I am very pleased with how these turned out, although I wish I hadn’t painted the faceted bowl. I think it would have looked better in its natural state.
1 COMMENT
Modern Day Moms
12 years agoI really love this! I am definitely going to try these. – Jess